JPEG Format

What Feature Do You Assign To The Function Button?

This post is a part of our Q&A section. If you want to submit your question, please use the form in the Contact page.

QA.jpg

Deepak (Mumbai, India) asked : What camera feature do you prefer to be assigned to the function button on a DSLR camera?

Deepak, to be honest with you, your question forced me to go back and see what are the other options available in the menu to assign to the function button. I always assigned only two of my favorite options and never looked back into other options. In the first part let me talk briefly about what is the function button and why should we use it? And in the second part I will explain what feature do I assign to the function button and why?

Nikon D90 Function (Fn) Button

Nikon D90 Function (Fn) Button

Function button allows you to change the particular camera setting without going deep down to the menu options. Once you assign the function button to the specific feature, whenever you press the function button, camera will adjust the setting for that particular shot. This feature comes very handy when you want to quickly alter the camera setting without wasting too much time navigating through the menu tree. Now let’s discuss how to assign one of the camera’s feature to the function button. In this example, I am taking Nikon D90 to refer to the menu items. If you use some other DSLR, your menu navigation might be little different.

Step 1 : Press the MENU button on the back of your camera

Step 2 : Go the Custom Settings Menu (pencil icon) and navigate down to f (controls).

Step 3 : Select f3 (Assign FUNC. button).

You have varieties of options available there such as spot metering, +RAW, matrix metering, center-weighted metering, flash off, framing grid, AF-area mode etc. Personally, my favorites are spot metering and +RAW mode. Why? Because I set the metering mode to the matrix metering by default and sometimes if I want to give the credit to the center of the subject for the metering purpose, I want to use the spot metering. When I am ready to shoot, I would then press the Fn button and the camera will use the spot metering for that particular shot and go back to the regular setting as soon as the picture is taken. And the same is true for choosing the +RAW mode as well. When I was beginning to learn the basics of photography, I always shot in JPEG Fine mode but once in a while I also took the RAW images to edit the picture later on the computer and learn more about the post-processing tools and techniques. So, whenever I wanted to take the RAW image, I pressed the function button and shoot with JPEG Fine+RAW mode for the particular shot so that the camera takes JPEG and RAW versions of the image and stores them into the memory.

You can play around with the options your camera has and decide which one you want to stick with for regular use. Thank you again for your question from which I also got chance to learn about other options my camera has. Happy shooting!

Understanding White Balance In Digital Photography

White Balance (WB) is the technique of managing colors in your picture. Unwanted colors which appears in the photograph are unpleasant and the process of removing or editing such insignificant colors is called the White Balance. White Balance is used to manage the color temperature, contrast, warmness of colors etc to get the real color tones. Digital cameras sometime get deceived with the light source and produces unpleasant photograph by mixing different colors in your photograph. Many photographers do not care about this option and they edit the colors during post-processing. But, in my view, its always worth to know about any technique that your camera has to offer so that you can apply it on the fly whenever you need it and probably save some editing time as well.

The basic principle and the simple reason we adjust the white balance is to get the colors of the photograph as accurate as possible. Most of the time, Auto White Balance works perfectly. But in some cases, applying Auto White Balance may produce extra orange, green or blue colors in your photograph. When we see subject with a naked eye, we see it pretty normal but camera's sensors apply different color settings to the photograph based upon different light sources. For example fluorescent light affects photographs with blue color whereas tungsten light source (Incandescent/Bulb) produces yellow color in your photographs. We can correct this problem with the help of White Balancing technique.

Bulb-Before.jpg

Photograph affected by the Bulb light source

Bulb-After.jpg

Photograph after adjusting the White Balance

Today's advanced DSLR cameras have many more pre-defined White Balance settings. Nikon D90 also comes with many White Balance options such as Auto WB, Incandescent, Fluorescent, Direct sunlight, Flash, cloudy, Shade, Choose color temp or Preset Manual White Balance. You can choose different Balance techniques depending upon the light condition you are shooting at.

Personally, I shoot RAW images if I doubt the lighting condition and then edit the White Balance later during post-processing.

Advantage of Shooting RAW Images

If you have a doubt on the given lighting condition, you may choose to shoot in a RAW Format and then edit those RAW images during post-processing. When you shoot picture in a RAW format, you will get the exact image taken by the camera's sensor without applying any adjustments like White Balance, Active D-lighting etc. In fact, camera will bypass all these settings and gives you RAW image. This is the beauty of shooting in a RAW format; let the camera take picture as it likes and edit them later on the computer.

And just in case if you want to shoot in a JPEG Format to save some space on your camera memory or for any other reason, Auto White Balance does a pretty good job most of the time. You can always take a shot, preview it on the LCD screen, set the white balance to one of the available presets and take another shot again.

RAW Vs JPEG Picture Format

RAW files are the exact representation of your subject captured by the camera sensor without any modification. RAW format retains more detail information about the picture and camera setting which you can adjust later during post-processing. Every camera manufacturer has their own proprietary format to store RAW files. Nikon uses NEF format to store RAW files and Canon uses CRW into older camera models and CR2 into newer models. Usually, RAW format stores information into 12 to 16 bit data. Camera always captures the data into RAW format first and if you are using JPEG mode, camera processes it using built-in algorithm to handle the white balance, contrast, saturation, sharpness and other settings that is set into your camera and compresses it into JPEG format to produce a 8 bit of data (JPEG) file. That means you will loose some details during the compression, which is pretty obvious given the reduction of information. I once read Ken Rockwell's comment about shooting in RAW mode where he says and I quote, "I never shoot RAW. Why would I? Raw is a waste of time and space, and doesn't look any better than JPG even when you can open the files". Later he added, "Cameras all start with raw data and convert this data to JPG images with hardware in the camera. They then throw away the raw data since it's no longer needed. Some fancier cameras save this raw data so you can use software to do the same thing the camera's hardware did, later".

In my view, shooting in either RAW format or JPEG format is your personal choice but the only difference is, if you shoot RAW, you have the flexibility to adjust settings later on the computer but in case of JPEG format, camera already did that job for you and you have to trust it’s algorithm for your final image since there is very less room left for further adjustment due to the loss of data. It is up to you whether you want to spend your money on getting software and use your time for further processing of your image on the computer or let your camera do that job for you. RAW mode is designed for someone who wants to do experiment with the photograph by applying different settings during editing. And if you are a professional wedding photographer for example, shooting in a RAW mode might be a no-brainer. You can't re-shoot the wedding once its done. And if you need to adjust something later on the picture without loosing details, you can do so with a greater flexibility if you shoot in a RAW mode. One thing you might want to consider while shooting in a RAW format is a memory. As we discussed earlier, RAW file uses 16 bit data format compare to the 8 bit format for JPEG file. RAW format takes almost double the size of JPEG format. If you are shooting all day event (using RAW format) capturing hundreds of photos, you might have to consider the memory size of your camera as well. It is always a good idea to carry an extra memory in your camera bag but if you are shooting in a RAW mode, that might become a necessity.

In my opinion, if you are smart enough to use a post-processing software for editing pictures, it is a good idea to shoot in a RAW format. But if you are not confident enough on using computer software to edit the pictures, it's better to believe in your camera and let it process for you. If you really want to see the differences between two formats, you can also use RAW+JPEG mode (most of the modern DSLR camera supports dual mode) which saves both files; one in JPEG format and another in RAW format. And later, you can try processing both formats using software and see the difference yourself. Reminder - since it keeps both file formats of the same image into your camera memory, you will have to be more careful about the memory space.

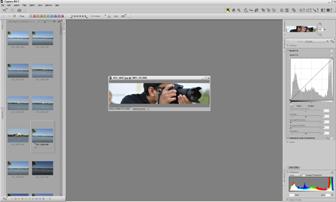
Personally, I shoot JPEG Fine for the most of the friends and family events. But I also shoot RAW when I do night cityscapes, fireworks or landscape photography and use Nikon Capture NX2 for post-processing. Please feel free to share your experience and tell us about views on shooting RAW Vs. JPEG.

Update : I switched from Capture NX2 to Adobe Lightroom in 2017