When I started my journey in digital photography ten years ago, I didn't have much interest in post processing. I was more focused on learning photography techniques, know more about the camera controls and the settings and get familiar with the gears, lights and other accessories. As I started gaining more experience with the camera setup and the gears, I felt more comfortable with the technical aspects of the shooting. Slowly, I started learning about the composition technique and used my technical skills to capture the image on various situations. The more I shoot, the more I felt that the camera was not able to capture all the colors I see through the lens. This is when I started to explore the possibility of introducing post-processing tool in my digital photography career. When I was shopping around for my first full frame but third DSLR, Nikon D700, I got introduced to Nikon’s own post-processing tool, Capture NX2, and without putting too much thought into it, I started using it. Since it was my first experience with any kind of post-processing tool, there was a steep learning curve for me but I enjoyed the process. After I started using Capture NX2 for a while, I felt like I was missing a big part of digital photography by overlooking the editing process in my early days of photography. Within a couple of months of using the software, I realized that, when post-processing is applied carefully and skillfully, it can completely change the look and feel of the picture and make it more alive again. But, suddenly, when I was just getting the hang of it, Nikon decided to discontinue the Capture NX2 software and stopped releasing the future updates and the support for the new cameras. I was still able to use the software (to process RAW files from my D700) for a couple of years even after their announcement but it became completely useless when I upgraded my D700 to D810 in 2017.
I had no choice but look for the alternatives which would support the RAW files from the Nikon D810. After doing much research, I decided to go with Adobe Lightroom. It's been little over a year since I started using the Lightroom and I couldn't be more happier. It is lightweight and very powerful program which works well with the varieties of RAW files. When I download the pictures on the computer, I import the RAW (NEF format) files directly into the Lightroom library and edit them when I want to. Besides Lightroom, I don't use any other tool to process my pictures. In terms of editing the picture, what I can do with the Lightroom, I could also do with the Capture NX2 but the process was complex and time consuming. In my experience, I found Lightroom to be much faster compared to the Capture NX2 and provides various powerful tools to edit the pictures with much more ease than it’s competitors. All of the edits done inside the Lightroom are non-destructible, which means Lightroom doesn't modify the original RAW file but only adds the instructions on the file based on what settings were applied during the development of the picture and renders the image by layering up those instructions step by step. You can always go back to the previous step and undo the changes you made in that step. However, Lightroom being a linear program, you have to be careful about going back to the previous step and undo the changes in that particular step because by doing so, it will erase all the editing going forward from that step as well. For example, after applying 10 steps of editing, if you go back to the 7th step and make any changes there, it will delete everything from the 7th step up-to the 10th step and you have to progress the future editing from the 7th step again.
When I was going through my old pictures, one particular picture caught my attention. It was nicely composed photograph of the World War II Memorial in DC but parts of the image were heavily overexposed which hid all the details in the area. I thought it would be nice experiment with the Lightroom and started editing it. When I finished the editing, the original picture I started with became much more balanced and appealing. Let me go through the step by step settings I applied on the original photograph below and how it got transformed into the final image shown at the bottom.
Before post-processing (click the image to view full size)
Usually, when I start editing the picture, I correct the lens profile and remove chromatic aberration first to see the real perspective of the image but in this case, I wanted to see if I can extract any details from the highlights by playing with the exposure and the contrast and then continue processing it if I was getting any satisfactory results.
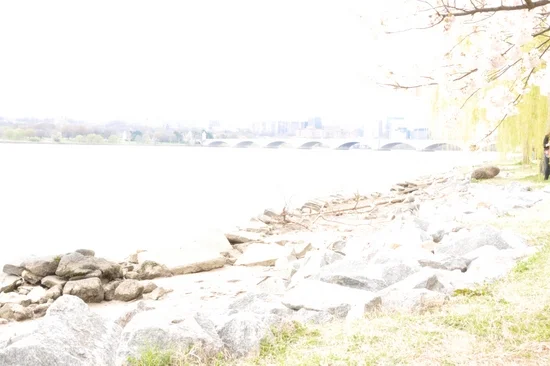
When the picture was first imported (click the image to view full size)
After adjusting the exposure, temperature and contrast, I tried to bring in some details by using the highlights and the shadow control. But in order to get more details, I needed to clip the white areas and some of the black areas as well which made the overall picture a bit darker but extracted some really nice details which was lost in the overexposed highlights before.
During the post-processing (click the image to view full size)
After adjusting light tones and dark tones, I tried to bring in some clarity by using the sharpening tool. You have to be very careful while using the sharpening tool because if you increase the sharpening too much, you will start noticing the digital noise in the picture and the picture doesn’t look natural.
When the processing was completed (click the image to view full size)
When I was happy with the details in the picture, color tones, shadows, highlights and the exposure, I adjusted the lens profile and removed chromatic aberration and cropped the image on the sides. When I cropped the image, I noticed some of the areas of the picture had random blurred objects which was the movement of the tourists created by the long exposure. I applied spot removal tool in those affected areas which blended those objects in by using the surrounding pixel colors. This tool is very helpful to remove the spots in the image caused by the flare or the scratch on the lens or even some small unwanted objects. Then finally, I applied the graduated filter tool at the bottom of the image, which simulates the effect of applying graduate filter on the lens, and darkened the bottom part of the image. I wanted to draw the viewer’s attention to the moon and the pillars of the memorial rather than the bottom part of the image.
Final Image (click the image to view full size)
Even though I applied the cropping tool, I didn't change the overall composition of the original picture. I just clipped the small part of the image on the right side to make picture look more symmetrical and removed the small area at the bottom to change the distance and the angle of perception to the main subject. If you want to see all the editing steps, please click the image to view in a bigger size and follow the processing steps.