
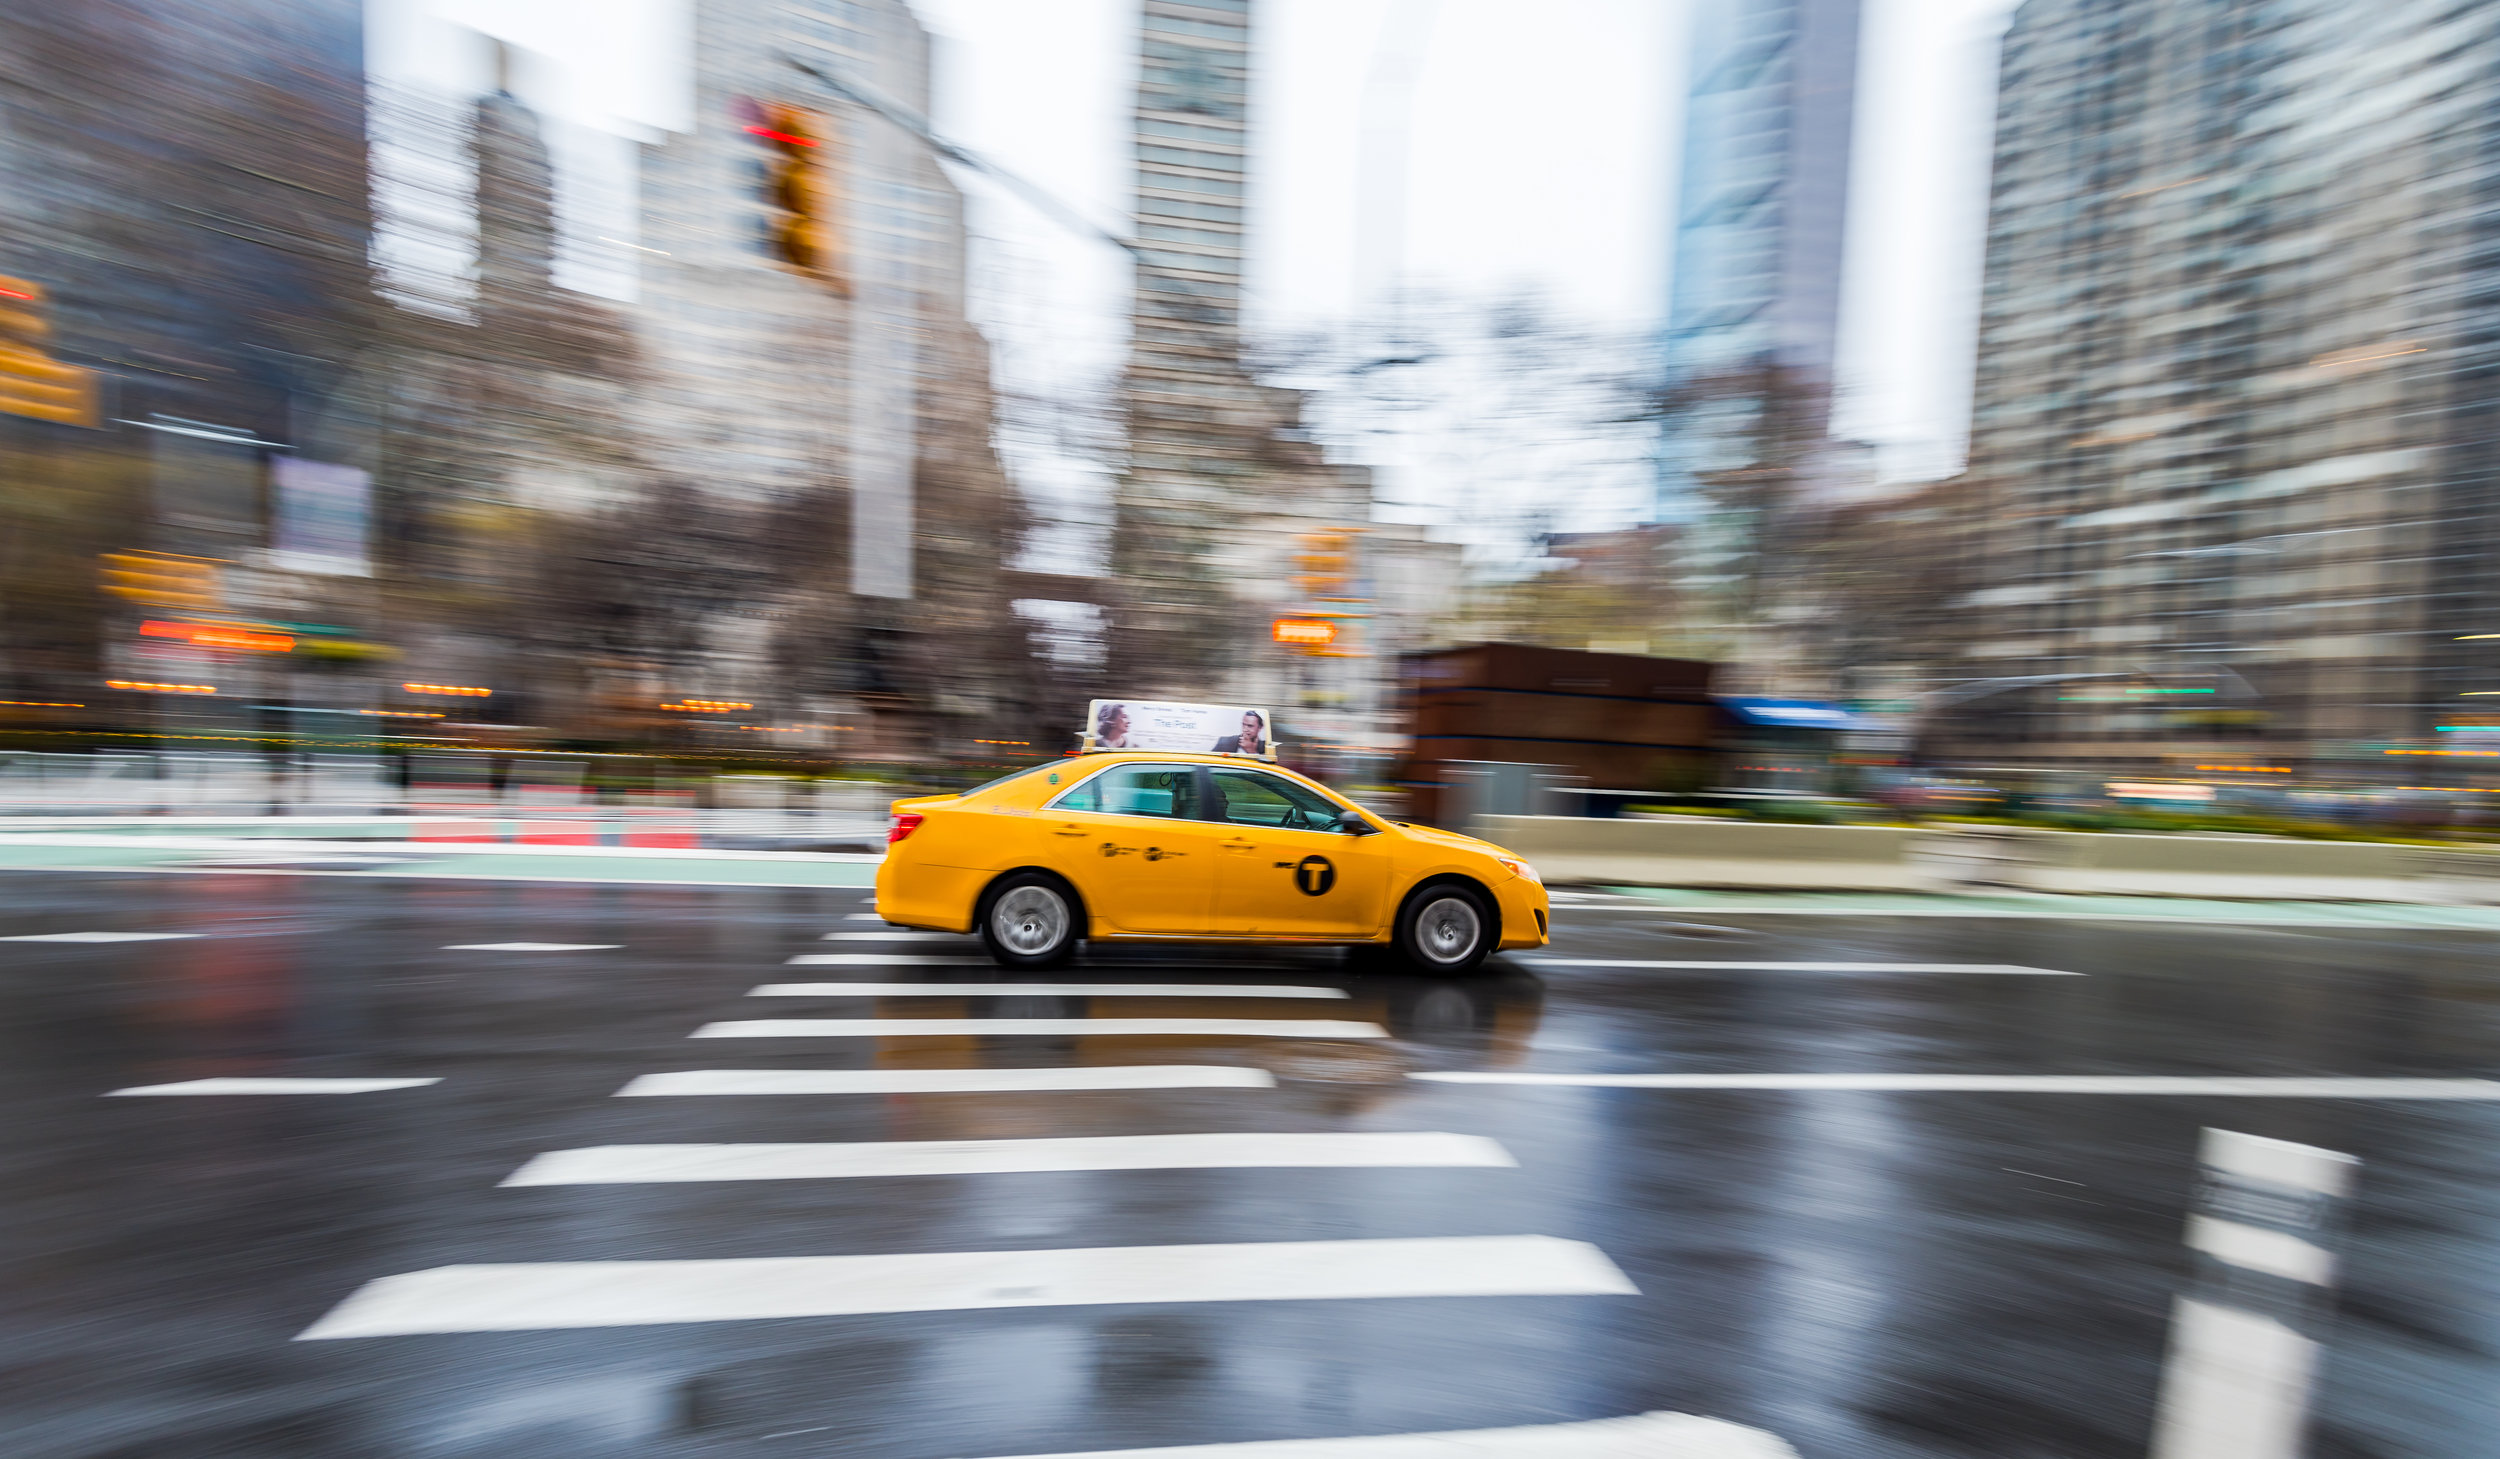
Panning is the technique which shows the motion of the subject, if done correctly. It involves the movement of the camera along with the moving subject either in horizontal or vertical direction. When we think of horizontal panning, we can think of situations like traffic on the road, racing games, sprinters or cyclists, whereas panning to capture the motion of a diver is an example of vertical panning. Theoretically, panning is a simple technique which requires you to use the slower shutter speed, maintain the focus on the subject, continuously pan with the subject and then take the shot. But getting a perfect panning shot is not as simple as it sounds. It needs precise focusing on the subject, good timing on releasing the shutter, balancing your distance with the subject and keep practicing with the different shutter speed until you get the balanced result.
Panning is an interesting concept where the motion is shown by freezing the movement of the subject while making the background blurry at the same time. We all know that freezing the moving subject requires faster shutter speed, but to make the part of the image blurry, we need to shoot with the slower shutter speed. If that is the case, you can possibly argue that how can we achieve the desired shot without combining multiple images, right? And that is the secret of this technique. You don’t have to edit the picture or combine shots in order to get the motion effect in a single picture. You would get it by properly applying the techniques, and timing the shot from the proper distance so that you could include the background in the frame, which is very important to get the motion effect. Now let’s get into the details of these techniques and see how can we master the panning shots.
Here is the list of my recommended tips and techniques in order to get good results with panning.
1. Shutter Priority Mode and the Shutter Speed
Since panning requires the control of the shutter speed, it is no-brainer to shoot in a Shutter Priority (S) mode. Now the question would be what should be the ideal shutter speed? In my experience, that varies from time to time as it depends on the speed of the subject, your distance to the subject and how much motion blur you want in the picture. I usually start with 1/15s to 1/30s if I am closer to the moving subject and decrease or increase by one third of the stop if I do not get the desired result. This range of the shutter speed works best for me when I am shooting cyclist or moving cars on the street. It might not work in other situations and that is why experimenting with the shutter speed is very important.
2. Enable VR on the Lens
If the lens you are using for the panning has a VR (Vibration Reduction) feature, I recommend enabling it. If your lens supports both Normal and Active VR, I suggest using the Normal VR which is designed to capture the image in general scenario where the camera shake might affect the picture, whereas Active VR is designed to compensate image blur while shooting from moving vehicles or other unstable positions. Stable camera is essential to get the sharper image and during the panning, you have to pan your camera along with the subject which makes the picture vulnerable for the camera shake. And that is the reason we enable VR which allows us to shoot comfortably with up-to four stops down (on certain lenses) and still get the sharper image. Generally, I turn the VR off if the camera is mounted on a tripod. But while taking a panning shot, I would use the VR whether the camera is on the tripod or hand-held.
3. Use Flash in Rear Curtain Sync mode
If you need to use a flash to properly expose the subject or in order to use the faster shutter speed, you would want to use the flash in rear curtain sync mode so that the flash fires at the end of the exposure, just before the closing of the shutter, and freezes the subject. While you are panning with the subject, you would press the shutter release button and the camera captures the movement (this will make the scene blurry). And, at the end of the exposure, while the shutter button still being pressed, camera would then fire the flash and freezes the movement of the subject.
Exposure : 1/25 sec Aperture : f/4.0 Focal Length : 16mm ISO : 64
4. Keep your Focus on the subject
Panning technique requires to maintain the focus on the subject all the time. If you take a shot where everything is blurry, it will not make an interesting picture and may not get the attention of the viewers, but if you keep your subject in focus where the rest of the image is blurry, viewers get drawn to the picture with their focus being locked on the subject. That is why maintaining the focus on the subject is very important for the success of panning technique. I use AF-C Autofocus mode to continuously track and maintain the focus on the subject while it is moving. You can also use AF-ON (back button focusing) button in AF-C mode which helps to maintain the focus on the subject by holding onto the button and use the shutter release button to take the shot.

Exposure : 1/25 sec Aperture : f/4.0 Focal Length : 16mm ISO : 64
5. Pan with the subject
I think this is the key element in getting a good panning shot. When you are ready to shoot, position yourself and maintain a good distance with your subject. When you find your subject, lock the focus on it and move along with the subject on the same plane of the motion and snap the shutter release button. When you see the subject moving in your frame, you can’t expect to freeze the motion of the subject while you are standing still with the shutter speed of 1/15s. A proper sequence would be - see the moving subject -> lock the focus on the moving subject (using AF-C) -> keep panning with the subject -> press the shutter release button -> and continue to pan with the subject naturally even after taking the photo. This inertia will help you to capture the crisp subject while making the background blurry.

Exposure : 1/25 sec Aperture : f/4.0 Focal Length : 17mm ISO : 64
6. Use a Tripod (if it is applicable and necessary)
Using a tripod is helpful only if you can predict the motion of the subject and also if the camera and the subject both will be moving on the same plane of the motion. If you are planning to use a tripod for the panning shot, I recommend using the one that supports panning. If I am using a heavier lens, 70-200mm f/2.8 for example, and have to use a tripod, I would use the Manfrotto 055XPROB Pro tripod with the Manfrotto 498RC2 ball head but the majority of my panning shots are hand-held. While shooting a bike race, the motion is more predictable, but if you are shooting a player running on a soccer field for example, movements of the player is unpredictable and using a hand-held camera is probably the best choice in that case. And if you are shooting hand-held, make sure that you are holding the camera with the proper techniques.
7. Practice more and more
There is no substitute for practicing more and experimenting with the shutter speed, maintaining a proper distance with the subject, properly moving along with the subject and snapping the shutter release button at the right time. As you practice more and more, you would buildup a habit and be mindful about what you should do and what you shouldn't do for the next shot. This is probably the only way to master the panning shot.

