What is an Exposure Compensation?
Exposure Compensation is one of the great features available in modern DSLR camera that allows you to adjust the exposure measured by its light meter. The range of adjustment depends upon the camera model. In case of Nikon D90, this range goes from -5 EV to +5 EV in increments of 1/3 or 1/2 EV where EV stands for Exposure Value.
This means that you can adjust the exposure measured by the light meter by telling the camera to allow more light in (positive exposure compensation, +EV) or to allow less light in (negative exposure compensation, -EV). Depending on how your digital camera deals with the exposure compensation and the shooting mode used, it may adjust the aperture while maintaining the shutter speed constant; it may adjust the shutter speed while maintaining the aperture constant; or, it may adjust both aperture and the shutter speed.
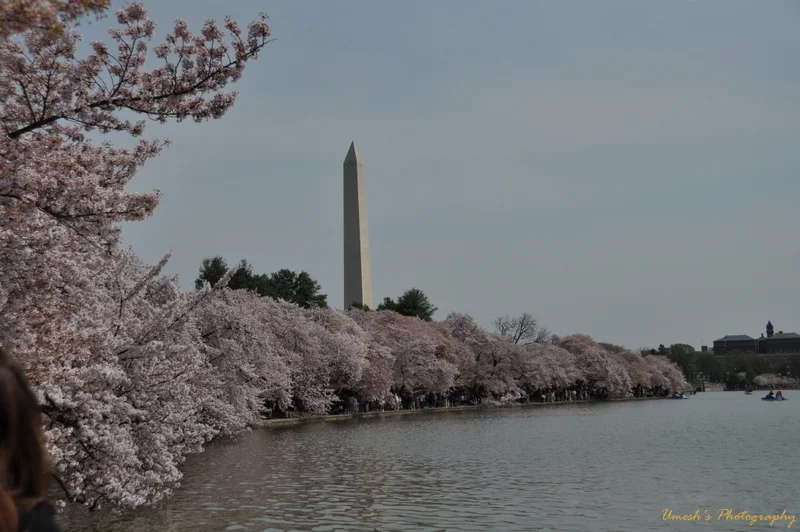
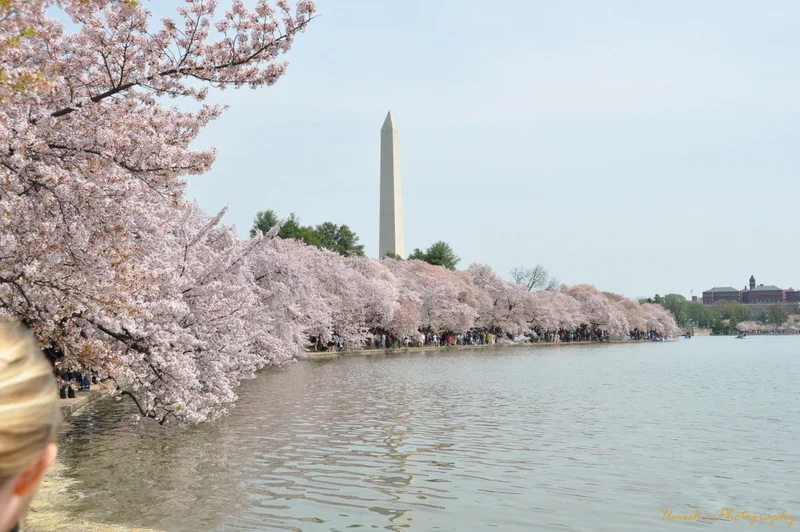
Let's look at these couple of photographs and see the effect of the positive exposure compensation.
At Normal condition (Without applying Exposure)
After applying Positive Exposure Value (+0.7 EV)
What is an Exposure Bracketing?
Exposure bracketing is a technique to make sure that the pictures are properly exposed under challenging lighting condition. Most of the times camera's sensor will automatically set the exposure setting by selecting an aperture and/or shutter speed combination to give the best result. But it doesn't work all the time. Sometime you may want to set the exposure manually overriding shutter speed or aperture settings depending on which shooting mode you are in.
Exposure bracketing technique allows you to take two (or more depending on camera model) pictures: one slightly under-exposed (e.g. -1/3 EV), and the second one slightly over-exposed (e.g. +1/3EV). This range of an adjustment vary with the camera's light meter. I believe it goes from -5 EV to +5 EV with 1/3, 1/2, 2/3, 1 or 2 EV range in case of Nikon D90.
When should we use Exposure Bracketing?
Whenever there is a complex situation of lighting, you should use this feature to get the proper result. Some photographers don't like to use this feature at all. They prefer to look at LCD and take another shot if they are not satisfied with their shot.
But the main reason we do this is to adjust the proper lighting condition over the main subject. Sometime camera's sensor gets confused by the light (too much or too little) to the main subject and hence the subject may be over-exposed or under-exposed. Taking three shots with the variation of exposure is good idea in this case. That is why we use bracketing.
As an example, you can see my above picture that I took under the normal condition. But it came out dark. Then I applied positive exposure compensation and got the balanced result.
Another example would be, lets say you are shooting portrait in snowy area. Your camera meter will adjust the exposure with the surrounding amount of light coming from the snow. In this case, camera senses more light and hence adjust an aperture (small aperture number) or the shutter speed (faster shutter speed) to compensate for the overall exposure. When you take the picture in this case, your main subject will be under-exposed. To fix this problem, you may want to set the exposure value to +EV to properly expose the subject and as a result, your background or surrounding might be over-exposed little bit. You have to calculate proper EV value to adjust this trade off between subject and background lighting in given situation.
Today's almost every DSLR camera allows you to shoot with different exposure value using automatic bracketing feature. If you are using Nikon D90, you can check my blog on Automatic Exposure Bracketing (AEB) where I explained how to setup the camera controls for Nikon D90.


