The Rule Of Thirds In Photography

If you are into photography world, you should have heard the term "Rule of Thirds" by now. And if you are here reading this blog, that means you want to know more about the rule, right? When you are taking any photography courses or learning the basics of photography, you should have come across the term at least once. It is probably the most well known and the widely talked principle of photography composition. Even though it is one of the few rules for composing photographs, it is not necessary to follow the rule of thirds every time you shoot. Sometimes you may produce an excellent shot without the rule being applied and sometimes the rule may come handy to make your picture look more appealing to the viewers. Sometimes, photographers who know already know about the rule, breaks the rule and apply their own. I do not disagree with this argument and sometimes rules are meant to be broken.

But if you want to break the rule, it is important to know more about the rule that you are breaking and find out what kind of impact would the rule have made into your photographs. You can't just say that I am breaking the rule of thirds in this photograph without knowing what the rule of thirds is about. I have not necessarily followed the rule myself every time when I go out and shoot but sometimes applying the rule had made really big difference on how the picture draws the viewers attention into it. Let’s talk briefly about the rule first, and then you can apply it in your composition or break the rule if you find it necessary for the photograph.

What is the Rule of Thirds?

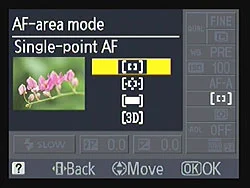
Rule of Thirds is a photographic composition principle where you break down your photographs into a third, both horizontally and vertically, like a tic-tac-toe board so that you have a total of 9 equal boxes framed inside the photograph. While you are composing the shot, you would imagine these boxes in your mind while watching through the viewfinder. After you draw the rule of thirds grid on your mind, it gives you few important parts (four intersecting points and four lines; horizontal and vertical) of the photograph where you should consider placing the point of interest so that the viewers find the picture more attractive and natural. Some of the DSLR cameras come with an option to have a actual grid displayed on the viewfinder screen while composing the shot. And as you practice more and be comfortable with composing the shot according to the rule, you can remove the grid display from the viewfinder (if it is distracting) or continue to use it if it is helping you to compose the shot.

ruleofthird.jpg

The theory behind the rule of thirds is when you place the point of interest of the photograph on the intersection points or along the lines, photograph will be more balanced and look natural to the viewers. It makes the use of natural tendency of the human eye to be more strongly drawn towards these intersections rather than to the center of the shot.

When you shoot portrait photographs, eyes are the natural focus point and you should consider aligning the body to one of the vertical lines. Usually, same is true for the wildlife photography as well with some exception.

Portrait-rule-of-thirds.jpg

Likewise, when you are shooting landscape, it is a good practice to position horizon along with one of the horizontal lines so that the picture look more structured and well balanced.

Lincoln-Memorial1.jpg

Even if you can't frame the subject using the rule of thirds during the composition, it may not be that big of a deal nowadays thanks to the high resolution digital cameras and the varieties of the post processing tools available in the market. While you are editing the picture on the computer, you can display the rule of thirds grid during the cropping process and can also drag the grid around to place the point of interest according to the rule and crop the image once you are satisfied with the composition.

How To Tell My Camera To Focus On Particular Area?

This post is a part of our Q&A section. If you want to submit your question, please use the form in the Contact page.

QA.jpg

Lita (Manila, Philippines) asked :  When I am taking pictures of wildlife, I use Autofocus (AF) most of the time for obvious reasons. And most of the time when I try to frame and focus the animal, trees and branches get focused instead of the main subject. How can I force my Nikon D90 to focus on particular area?

Lita, if you do not want camera taking the control of the focus, short and quick answer is to manually focus the subject. When you manually focus using the focusing ring on the lens barrel, you can select the area to be in focus whether it would be in the middle of the frame or at any other focus point. But we all know that focusing manually is not a practical solution specially when you are shooting wildlife and that is the reason our DSLRs come with the autofocus option to quickly focus your subject. And autofocus works perfectly in most of the situations but sometimes you may encounter the problem you have described in your question. When you are using the Manual Focus mode, you can take over the control of the focusing system but the good news is that, your camera Nikon D90, may have a solution for the AF users as well.

Nikon D90 Back View.png

When you are shooting in Autofocus mode and want to take the control of the focusing system, you need to change the Autofocus option inside the Custom Setting Menu (CSM). By default, Nikon D90 selects the focus point automatically based on the information it gets through the lens and that was the reason, sometimes, you were encountering the focusing issue. And the reason is, your camera can not differentiate between the subject and the object inside the frame. To change that default setting, press the MENU button on the back of your camera and go to the CSM menu (Pencil Icon). Then choose the first option (a Autofocus) and select the Single Point. When you select the autofocus point to a single point, you can now select the focus point by using the Thumb Pad (Multi-selector button) on the back of your camera and lock the focus point wherever you want by using the AF Selector Lock lever next to the LCD screen. This guarantees that the camera is focusing on your intended subject because you've told it in advance which of the 11 AF points to use for the focusing.

Wild-Cat1.jpg

Note: If you want to lock the focus point into one spot, please make sure that the lever next to the LCD screen is switched to the L (Locked) position after you select the preferred focus point, otherwise, you might inadvertently select a different AF point by bumping into the thumb pad. The lock switch was designed to prevent such accidental change of the focus point and works really well. Your camera locks the focal point in L position of the lever switch and allows you to change focus point when the lever is set to the Unlocked (Single DOT) position.

Nikon SB-700 Speedlight Review

I am a big fan of Nikon CLS technology and Nikon impressed me once again with it’s newly announced small and compact but powerful lighting system, SB-700. This flash unit lives up to the Nikon legacy. I always repeat the fact that photography is all about adjusting the composition and the lights. To support this fact, most of the DSLRs come with a built-in flash but the features they provide is very limited. That's why it is almost necessary to have an external flash unit which can provide creative control over any given lighting condition. If you are using a Nikon DSLR, you have many options to choose from; SB-R200, SB-400, SB-600, SB-700, SB-800 or SB-900. The Nikon Speedlight SB-700 is the newest addition to the Nikon flash lineup and can be considered as a replacement for SB-600. I was using a SB-600, which worked fine, but the SB-700 was just a great upgrade. Let’s talk briefly about this new gadget from the Nikon.

Nikon’s SB-700 is a compact flash unit but filled with features that SB-600 lacks and some of the features are inherited from more professional flash unit like SB-900. The built and the design of the unit looks professional, supports commander mode, capable of multi-step auto zoom up to 120 mm. It is designed with high-speed recycling time of 2.5 seconds with the NiMH batteries and 3 seconds with the Alkaline batteries. The built size of Nikon SB-700 (2.8 × 5.0 × 4.1 in) is a bit larger than SB-600 but smaller than SB-900 unit. However, it resembles more with SB-900 and shares some of the features and the control layout with SB-900 as well. The interface on the SB-700 is much more straight forward than the SB-600 which requires you to push two buttons at the same time to get into the menu items and configure the flash unit. The SB-700 is a much easier and faster unit to setup and has more features than the SB-600.

SB-700 is redesigned with the interactive control and very easy to setup and use. As I mentioned before, some of it's features and even controls are borrowed from SB-900. It has a nice LCD screen on the back and includes two mode switches on the left and the right side of the LCD screen which allow user to change modes without navigating through all the menu items. The SB-700 comes with the incandescent and the fluorescent filters for the color balance when shooting indoors. The SB-700 automatically detects the type of filters in use and adjusts the settings accordingly. It also comes with a built-in bounce card that can be used for the bounce flash effects and the diffusor to soften the intensity of lights.

Nikon Speedlight SB-700

Nikon Speedlight SB-700

Features & Performance

1. Automatically senses the FX or the DX-Format camera in use and optimizes the light distribution.

2. Automatically identifies the mounted hard type color filters and adjusts the camera white-balance.

3. Works with the Nikon’s i-TTL (intelligent through-the-lens) metering system. This system works by firing a series of flash bursts to assist the camera in analyzing the scene. The camera’s metering system then processes this information and sends it back to the flash unit, balancing the flash output with the ambient light.

4. Using the simple slider switch on the back of the SB-700, you can optimize the light quality by selecting the Standard for general illumination, Center-weighted for portraits or Even, for groups or interiors.

5. Most of the newer entry level Nikon DSLRs do not have a commander mode to remotely control the flash Off Camera. And in that case, SB-700 can be used as a commander flash unit as well to control multiple wireless flash units.

6. SB-700 has a built-in thermal cut-out detection feature to prevent it getting damage from overheating. It works by extending the recycling time when SB-700 detects the heat build-up.

7. Flash Value (FV) Lock feature locks in a specific flash output on the main subject, regardless of the aperture, composition or the lens’ zoom position.

All in all, I highly recommend this flash over the SB-600. I wanted to get the SB-900 but its just too big and heavy for my needs and also couldn't justify the additional cost as well.