
This post is written by Guest Contributor, Alex B. Wright. If you are also interested in writing a guest blog, please reach out using the form in the Contact page.
We know that there are two types of exposure meters for measuring light that the camera uses. One is reflected and the other is incident. What does this mean and how do you use both? The type that is in most cameras is a reflected kind. Incident is the meter that has a dome on it and this dome is pointed to where the camera is. The reflected meter is pointed at the subject to get proper exposure. Some meters also measure flash but that is another topic. You might ask why 18% gray? Where did they get that number? Well here is the math behind your question. If we use the number 3 for our starting point at the blackest image you can have. Double that number we get 6 and double it again we get 12, double it again we get 24, double it again we get 48, double it again we get 96 and this is the lightest that can be recorded. This as you may have already guessed is tied into f/stops; each time you go to a larger lens opening, you double the amount of light that hits the light receptor that records the image. Now write this number down. Between 12 and 24 you get the number of 18 and that makes it in the middle of the exposure. That is half way between the darkest black and the lightest white. That is why exposure meters are programmed to 18% gray.
Now let’s talk about the exposure meter in your camera, a Reflected Meter, regardless of camera model you have. It measures the light coming into the receptor, mixes it all up and gives you an 18% gray which is the half way from Black to White. The meter measures the light reflected back from the subject in front of the camera.
The second type of meter is the Incident Meter which is not built into the camera. It is a separate meter that has a dome. This dome is at the subject location and is aimed at where the camera is to be located. As an aside, this is the type that is used in most studios. With this type of meter you can get the ratio of the light that falls on the subject when you are in a studio set-up. This is not an explanation of lighting ratios and how to get them. Lighting and ratios is another topic for a later day. But you can use your camera even though it is a REFLECTED light meter and can be changed it into an INCIDENT light meter later. This is not that hard to do as it sounds. There is a simple way to accomplish this which we will discuss in next paragraph.
Only the secrete thing you need is a clean white Styrofoam coffee cup and then place the coffee cup over your lens. It is best to use a 50 mm lens. Now, aim the camera from the subject’s location towards where the photographer will be and get that exposure reading noted down. Manually set the camera to this exposure reading, remove the coffee cup, go to the camera location and take the photograph. This is what the dome on the incident meter is for and how it is used. Just try this out and your exposures will be more accurate. Use the meta data information about the image you have just taken.

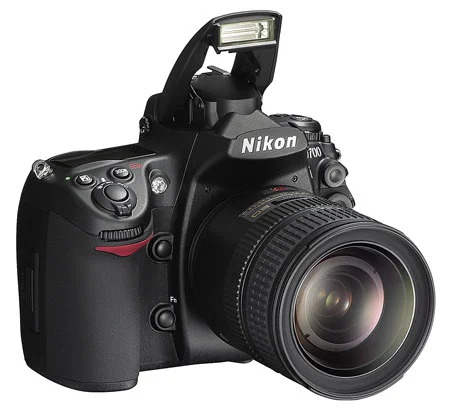

Almost all consumer level DSLRs and some of the pro level DSLRs come with the built-in flash. Professional photographers who shoot wedding, fashion, commercial portrait, or other special events do not rely on built-in flash to illuminate their subject. But, you don't have to use flash only when there is not sufficient natural light. It can also be used as a fill light to remove shadows or to add a catch light to the subject's eye. One of the best thing about the built-in flash is, you don't have to carry around an extra equipment and is always available on your camera, as long as the camera has sufficient battery power to charge and fire the flash. It can be put to use instantly whenever you want and doesn’t require any sophisticated setup. However, you need to understand few basics settings of your camera and should be comfortable navigating through the menu settings and the buttons on the camera.
Use of camera's built-in flash and its effect on the picture is determined by various settings on the camera, but most importantly, which metering mode you are currently using and what exposure mode you are on play a bigger role. Let's recap these camera metering modes briefly and then we can discuss about the steps we would be following in order to use on-camera flash. Since I wrote the blog about camera metering (in more detail) almost 9 years ago, Nikon has added a new metering mode; Highlight-Weighted Metering, which we will be discussing in the section below.