What Do The Numbers Printed On Your ND Filter Tell You About The Filter?

When you are shopping for the ND filters, you may have been in a situation where the numbers (printed on the filter) confuse you more than help you. All you want to buy is 1-stop, 2-stop, 3-stop or 10-stop filter which blocks 1-stop, 2-stop, 3-stop or 10-stop of lights respectively but the numbers manufacturers use to represent the f-stop creates more confusion. When I bought my first ND filter back in 2012, I actually ordered the wrong filter because of this confusion. I wanted to buy a 3-stop ND filter and when I looked online, it was showing Neutral Density 3.0 and I thought it was the right filter. But later when it arrived, it seemed darker than it should be for a 3-stop filter and after doing little bit of research, I realized that the filter I got was a 10-stop filter and not a 3-stop filter. My fault was not to do proper research before buying the item but I think it would be fair to blame the part of the mistake on how manufacturers label their product as well. Why wouldn't they simply market the filters as 1-stop, 2-stop or 3-stop filter and avoid any possible confusion? I don't know the answer for this question yet but the good news is that some of the vendors have started using more sensible naming practice with the detailed description of the products. Today, I was trying to get another ND filter and the past memory came back to me. So, I thought it would be helpful for you guys to share what I have learned so that you can make the right decision when you are shopping for the ND filter. After I made a mistake during my first purchase, I tried to find out why manufacturers use these numbers and how does this naming conventions make sense? After knowing the science behind the numbers, I shifted more blame towards me for the mistake I made but I think there is still some room left to blame the manufacturers as well. It's the manufacturers job to market their products as clearly as possible so that the buyers can easily understand what they are getting.

Let's take an example of the ND filter I was going to get today and see what the numbers tell us about the characters of the filter.

Name of the ND Filter (on Amazon) - B+W 77mm Neutral Density 0.9-8x Filter #103

In the above example, B+W is the name of the manufacturer who built the ND filter and 77mm is the diameter of the filter to fit the 77mm diameter lens. You can't fit 77mm filter on 72mm lens which is obvious. This is also something you have to be careful while shopping for the circular filter. You have to match the diameter of the filter and the lens. Now, the more confusing part of the name is 0.9-8x and #103. Let's see what do these numbers suggest.

The first number 0.9 represents the multiple of the f-stop optical density (0.3) with regard to how much light the filter is letting through the lens to the sensor. The number 0.9 in our example filter is a multiplication of (0.3) and (3) which tells us that this is a 3-stop ND filter. By using this filter, only (1/2) * (1/2) * (1/2) = 1/8th of the light that hits the front of the filter is passing through the lens. The number 1/2 would be the fraction of the lens area opening if the optical density would be 0.3 compared to the full lens opening of 1 for 0.0 optical density (which means no filters are attached to the lens).

The second number 8x suggests that if you use this filter on your lens, you will need 8 times more light than without the filter to get the same level of exposure. You can get 8 times more light by using the longer shutter speed, widening an aperture (if possible), increasing the ISO value or by using the combination of the three. How to adjust the exposure setting depends on what you are trying to achieve by using the filter. Usually, ND filters are used to get the long exposure shot and hence you would want to increase the shutter speed to compensate the loss of light with the introduction of the filter.

The Third number #103 represents the general naming convention (look at the table below) to represent the 3-stop filter. So, if you look closely, all these numbers mean the same thing and that is the filter in our example is a 3-stop ND filter. If we attach this filter in front of our lens, we need to slow down the shutter by 3-stop (or 8 times longer shutter speed is required) to get the same level of exposure as we would get without the filter. If you are shooting with the shutter speed of 1/8th of a second, an aperture of f/11 and the ISO 100, after applying a 3-stop ND filter, your new shutter speed would be 1 second (1/8 * 8 = 1) to get the same exposure considering the other two exposure parameters, aperture and ISO, are same. However, in a real world scenario, you might need to adjust the calculated shutter speed little bit up or down depending on shooting condition and the quality of the filter you are using.

If the filter in our example had a 3.0-1000x number on it, it would mean a 10-stop filter (3.0 = 0.3 * 10) letting in only 1/1000th of the light and requiring 1000 times longer shutter speed to get the same exposure as without the filter. If we do a proper math using the same formula we used before and multiply (1/2) * (1/2) *.....* (1/2) 10 times, the actual number should be 1024x but for the simplicity, 1000 is being commonly used as a rounded number. If you are interested to know how to take a long exposure shot using a ND filter, here is an article I posted earlier last week about Using a 10-Stop ND Filter for a Long Exposure Shot. You can also stack the filters and multiply the effects as well. If you use 0.9-8x filter on top of 3.0-1000x filter, the effective value would be 3.9-8000x requiring to keep the shutter open for 8000 times longer than without the filter.

During my research, I found this table below on the Wikipedia and thought it could shed some lights on the discussion we just had about the significance of the numbers to represent the ND filters. The rest of the article below is an excerpt from the Wikipedia.

In photography, ND filters are quantified by their optical density or equivalently their f-stop reduction.

ND-Filter-Numbers.jpg

Note: Hoya, B+W, Cokin use code ND2 or ND2x, etc; Lee, Tiffen use code 0.3ND, etc; Leica uses code 1x, 4x, 8x, etc.

Understanding Flash Sync Modes - Which Sync Mode Should You Use?

Nikon DSLR cameras come with the five different shutter sync modes to work with the flash. Not all the exposure modes (S, A, P or M) come with the same flash sync modes but they are available in a slightly different variation depending on which exposure modes you are on. You might want to check your camera manual to find out which sync mode is available in which exposure mode. To change the flash sync mode in your camera, you can hold down the flash button (usually on the front left side of the camera body near the built-in pop-up flash unit) and rotate the main command dial. When I was first learning about these different types of sync modes, they sounded very confusing to me. After reading lots of articles and doing lots of practice on my camera and flash, I got the hang of it. If you are new to flash photography, I am sure it sounds confusing at the beginning. It is simple concept to understand yet confusing sometimes but let me explain them briefly and as clearly as I can. And if you already know about these modes and experimenting a lot with the flash, this might be a topic of interest to you as well.

Normal-Sync-Flash.jpg

1. Front Curtain Sync (Normal Sync) - In this mode, camera fires the flash as soon as the front shutter curtain (or first curtain) has been fully raised. It means camera fires the flash as soon as the window for the exposure is opened. Sometimes, it is also called firing the flash at the beginning of the exposure. When your camera is set to the Front curtain sync mode, the slowest (minimum) shutter speed it uses is 1/60th of a second (default to most of the DSLRs which you can change later by going into Flash shutter Speed menu inside the Custom Menu). This shutter speed is also called "Flash Shutter Speed". If your subject is in a low light condition, flash would be the only light for the exposure since the faster shutter speed cuts the ambient light. But if you are shooting with the Normal sync in a bright day light in an Aperture priority mode, your camera will try to use the fastest (maximum) shutter speed defined in "Sync Speed" which is usually 1/250th of a second. If you need a faster shutter speed than the sync speed, you will have to setup an Auto FP High Speed Sync which allows to sync your flash up-to 1/8000th of a second.

Front Curtain Normal Sync

Front Curtain Normal Sync

Normally, you should use the Front Curtain Sync when your subject is in a dark condition and flash is the only source of light and you don't care too much about the background. It is also widely used for standard studio setup where your only source of light is the flash light or the studio strobe.

Red-Eye-Sync-Flash.jpg

2. Red-eye Sync with Front Curtain - Have you ever noticed a red-eye effect while shooting a portrait? Usually, red-eye is caused by the light from the flash reflecting off the back of your subject's retina. When you are shooting close and with a straight flash, pop-up flash for example, it is very likely that you get the red-eye effect. And if your subject is in dark, red-eye gets worse because of the increased size of the subject's pupils (pupils get bigger to be able to see in the dark).

When you use the red-eye sync mode, depending on which flash system you are working with, camera will try to overcome the issue with a different technique. If you are using an external flash unit, camera fires series of quick light pulse just before the shutter opens. And if you are using a built-in pop-up flash, red-eye reduction is accomplished by illuminating camera's red-eye lamp, which is very bright and might be annoying to the subject. The best way to reduce the red-eye effect is by moving the flash unit away from the camera by using cords or wireless technology.

Slow-Sync-Flash.jpg

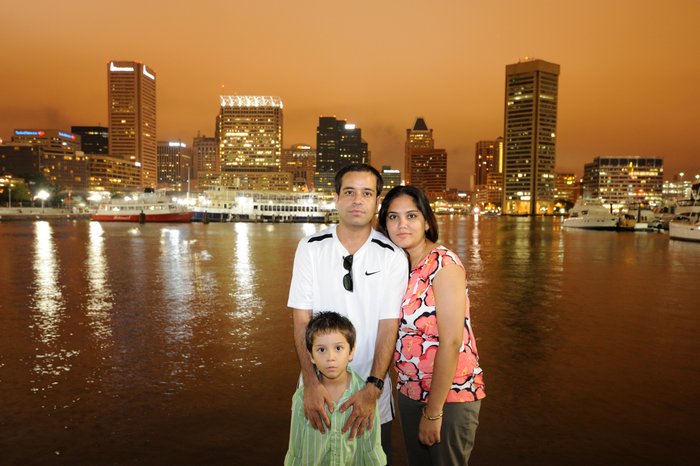
3. Slow Sync - Slow Sync mode allows you to use the flash to expose your main subject while getting the ambient light to expose the background or surroundings. The standard Slow Sync mode is the front curtain sync mode in which camera fires the flash at the beginning of the exposure and then keeps the shutter open for the ambient light exposure. Normal Slow Sync or Front Slow sync is used mainly when your subject is stationary. For example, if your subject is standing still in front of a building at night, you want to use the normal slow sync to illuminate the subject with the flash and then the shutter will be opened for the ambient exposure to illuminate the background.

Slow Sync Flash Photography

Slow Sync Flash Photography

If your subject moves during the exposure, you will get the motion blur due to the long exposure.

Using Slow Sync Normal Flash (ball was moving from the right to the left)

Using Slow Sync Normal Flash (ball was moving from the right to the left)

In this mode, since the flash is fired at the beginning of the exposure, it freezes the subject initially but if the subject starts moving while the shutter is still open to capture the ambient light, it produces a motion blur after subject is initially being frozen. Sometimes this can produce an interesting picture with the motion blur but it could be a distraction as well. So, you have to be really careful while using this mode for a moving subject.

Slow-Sync-with-Red-Eye-Flash.jpg

4. Slow+Red-eye Reduction Sync - This is a slight variation on the Red-eye reduction sync we discussed earlier. In this mode, flash fires at the beginning of the exposure freezing your subject and keep the shutter open for the ambient exposure. Since this mode is similar to the Normal Sync where flash fires as soon as the shutter is opened, red-eye reduction sync works exactly same as the previous case.

You should use this mode when you want to use on-camera pop-up flash to illuminate the subject and keep the background lit with the slower shutter speed by capturing the ambient light. The problem with this mode can be similar to that of slow sync mode where if subject moves right after the flash is fired, you get the motion blur due to the longer exposure setting (shutter is kept opened after the flash is fired for the exposure).

Slow-Rear-Sync-Flash.jpg

5. Slow+Rear Sync - This mode works exactly as the Slow sync mode except that the flash is fired at the end of the exposure just before the rear curtain (or second curtain) is closed rather than at the beginning. In this mode, the front curtain is opened first and the camera sensor starts collecting the ambient light and then just before the rear curtain begins to close, the flash fires. In this mode, the term "Slow" refers to the longer shutter speed and the "Rear" refers to the flash firing before the rear curtain closes.

Using Slow Sync with Rear curtain (ball was moving from the right to the left)

Using Slow Sync with Rear curtain (ball was moving from the right to the left)

This mode is widely used to include the motion blur as an effect rather than a distraction. For example, if you are taking a picture of a moving car (driving forward) using this mode, the shutter opens for the exposure and the car movement creates a blur effect but at the end just before the rear curtain is closed, flash will be fired to freeze the car motion. In this example, the motion blur seems natural giving the sense that car is moving forward leaving nice light trail behind. If we use the normal slow sync in the same scenario, the motion blur occurred at the front of the moving car making it as a distraction (also giving the sense that car is moving backward even though it is moving forward).

When you are using Slow Sync modes, it's best to dial down the flash power to balance the ambient exposure (you can see the ball is little overexposed in both of the examples above). You can test with -1 flash power and do some test shot and then adjust the flash power accordingly for proper balance between the flash and the ambient.

Note : This mode is only available in an Aperture Priority Mode (A) or the Program Mode (P) because these are the only modes where camera controls the shutter speed. But if you are using the Shutter Priority Mode (S) or the Manual Mode (M), you set the shutter speed and the camera can't adjust it independently and hence camera only uses a Rear Sync mode where camera still fires the flash at the end of the exposure just before the rear curtain is closed creating a nice trail effect in a moving subject.

Which Sync Mode should you use?

The most popular and the widely used sync modes are the Normal Sync mode and the Slow+Rear Sync mode. If you do not want the ambient light to contribute to the overall exposure of your photograph but want to expose the subject using the flash light, you should use the Normal Sync mode. And if you want to use the ambient light to expose for the background and the surrounding and illuminate your subject by using the flash light, you should use the Slow+Rear Sync mode. You can also use the Slow+Rear mode if you want to create a motion blur effect on the moving subject. While using Slow+Rear mode, even if motion blur gets produced without your intent, most of the time it gives a nice effect on the photograph rather than being a distraction. Red-Eye reduction methods are rarely used and their effect can be easily corrected during post-processing.

Using a 10-Stop ND Filter For a Long Exposure Shot

Last Saturday, I did a little fun experiment with the speed of the shutter on the flowing water while keeping the other exposure parameters, Aperture and ISO value, same. I had seen some really nice photographs on the Internet with the milky effect on the water which inspired me to try something similar on my own. I really wanted to try this on a big water fall where the water volume and the current is high but one of the such area I know nearby was closed due to the bridge construction. I am planning to go there again after the construction is finished. Meanwhile, I tried something similar in a little creek near my area. It was a bright sunny day and the only way I could achieve a long exposure shot was by using a Neutral Density filter. Here is the list of the tools I used for this setup. 1. Nikon D700 DSLR Camera 2. Nikon 16-35mm f/4 Wide Angle Lens 3. 10-Stop ND Filter (To stop the lights so that I can use the longer shutter speed to get the milky effect) 4. Shutter Release Cable (It is recommended for a long exposure shot to avoid any camera shake. If you do not have one, you can use the 2 seconds timer on your camera) 5. Tripod (It is a must have tool for a long exposure shot) 6. Exposure Calculator App (To calculate the exposure after applying a ND filter)

After setting up the camera on the tripod, I measured the correct exposure (in a Manual Mode) before using a filter and took a shot. I used the widest possible focal length (which is 16mm on this lens) and chose the minimum ISO possible to avoid any digital noise. And since it was a sunny bright day, I didn't need a higher ISO anyway. I turned off the VR on the lens (really don't need when you are shooting on a tripod), selected an aperture value of f/11 and manually focused the lens to the infinity to get everything in focus through out the frame. With an aperture value of f/11 and ISO 100, camera meter gave me the correct exposure with the shutter speed of 1/8th of a second. Here is the first shot with those camera settings.

Water_Effect_Short_final.jpg

 Focal Length : 16 mm     ISO : 100     Shutter speed : 1/8 sec     Aperture : f/11

Exposure-Calculator-App.jpg

Then, I applied a 10-stop ND filter on the lens and calculated the required shutter speed (using an app on the left side) to compensate the lights blocked by the filter. Since I left the ISO and the aperture values same, Exposure Calculator App gave me the shutter speed of 128 seconds as the right shutter speed to get the correct exposure. Most of the modern DSLR supports the shutter speed of up-to 30 seconds and if you need more than that, you have to dial into the BULB mode and open or close the shutter manually by pressing the shutter release button. But the cool thing about this app is that it gives you a stopwatch (at the right bottom corner) after you calculate the new shutter speed. When you are ready to take a shot, you can snap the shutter release button (with the shutter release cable) and then start the timer on the app at the same time. And when your timer goes to the Zero, you can release the shutter as well by releasing the button on the shutter release cable. When I took the second shot, I noticed that the shot was little bit underexposed. Then I took another shot without changing any settings but kept the shutter open for an additional 5 seconds than the app suggested. If you are shooting in a RAW, little bit underexposed image is far better than the overexposed because it is easier to bring the details from the shadow than from the blown out highlights during the post processing. The reason I got the underexposed image with the calculated time could be due to the changing light during the long exposure time or the filter coating variation or the programming on the app itself. Normally, I take the value given by an app as a base value and then play around few seconds left and right while monitoring the histogram chart on the LCD monitor until I get the correct exposure. Here is the second shot with the long exposure setting (notice the leaves movement and the person in a picture below which are the distractions).

Water_Effect_Long_final.jpg

Focal Length : 16 mm     ISO : 100     Shutter speed : 133 sec     Aperture : f/11

May be due to the amount of the water flowing in the creek and the current of the water, long exposure didn't produce very much dramatic effect that I was hoping for but there is some noticeable effect on the water due to the longer shutter speed. Some people prefer the first version with a shorter shutter speed and some prefer the second version. I am not sure which side of the aisle you are on but it doesn't hurt to try something new and out of the ordinary as long as you enjoy doing it.