This post is written by Guest Contributor, Alex B. Wright. If you are also interested in writing a guest blog, please reach out using the form in the Contact page.
This is a very common question that is asked by those who want to get a better flash than the one they already have. Put simply the Guide Number is the output of the flash that can be used to find out the f-stop to be dialed into the camera when the flash distance is known. The trick is to divide the Guide Number (GN) by the distance (in feet) and the answer is the f-stop you set your camera into. In simple math, if your Guide Number for a particular flash is 56 and you are 10 feet away from your subject, the f-stop you are going to use is f/5.6. The shutter speed can only be as fast as the camera manual states;with my camera it is 1/180th of a second. You can shoot less but if you go faster it will cut of part of the image and this part will be black (because of the flash sync speed). The flash fires at an extremely high speed but the sync speed of the flash can be lower so that you can get some of the ambient light in your exposure. This works well when you are taking mood images. One thing to remember is, the higher the Guide Number the more power the flashgun has. To be sure, you can check the flash output if you have a flash meter. One thing you have to make sure is that the Guide Number and the distance to the subject both are measured in the same unit. If it is an European device, then it usually is in Metric system. And, in that case, you can measure your distance to subject in Metric system (centimeters or meters) as well and divide GN by distance and you will get your f-stop number.

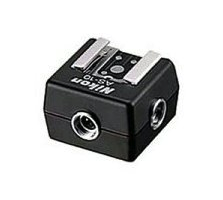
Safe-Sync Hot Shoe To Hot Shoe
Now one really important thing to remember is do NOT use a flash unit which trigger voltage is not known to you because if it is over 5 volts, it may fry the camera internal parts. If this is the flash that you used with your film camera then it is probably not a good choice. Most of the new digital cameras trigger voltage is 5 volts. If you want to go higher voltage, you will need an adapter that steps the voltage down to 5 volts. If you are in doubt, have the flash voltage checked by a competent camera repair-person. Alternatively, you can get the product like Safe-Sync Hot Shoe To Hot Shoe (SSHSHS) made by Wein which is about $70.00 Canadian dollar. If you buy your stuff online, you can get it from Amazon for $49.95 USD right now. This device sits on top of the hot shoe and the flash fits on top of this device. This device works with AC powered strobe units. I have a set of Bowen’s studio units. There is a PC port on the Wein unit that the flash can plug into. This is a very handy thing to have in your camera bag. When you want to purchase a newer flash there are several third party manufacturers that make compatible units. You do not have to go with the manufacturer of the camera it is going to be used with. Most of the units have price going for them. You can get some of the flash unit as low as $150. Just check out the features you need and compare the price and then go to the camera store and make your choice.