
In real world, there is nothing called real white or real dark. It is only representation of degree of light source intensity and subject's reflectivity. If somebody says something is white, that means light intensity on that subject is maximum and that of black is minimum. But there is no real measurement which is absolute white and which is absolute dark and same thing applies to photography. I think that is the reason there is a term called "dynamic range of colors" and we are going to discuss about it today. When we talk about dynamic range, we are talking about range of brightness. For example dynamic range of our eyes refers to the range of brightness in which we can see. When you go to the room that is so dark you can't see anything, then you are outside of the dynamic range of your eyes. Similarly if you are driving to the direction of the sun, you might have trouble seeing road properly and you are sort of blinded by powerful lights of sun. And that means you are again outside of dynamic range of your eyes; you are experiencing more light than your eyes can handle. Obviously more dynamic range you can perceive, more places you can see. Dynamic range also impacts your perception of color because colors have brightness. So when you can see better range of brightness, you can probably see greater range of colors.
In terms of photography, dynamic range gives the ratio between white and dark subject and describes the ration between maximum and minimum intensity of light (contrast ratio). As you all know that light is measured at each pixel level (a digital camera uses a sensor array of millions or tiny pixels to produce the image) and each of those pixel contains "photosite" which collects and stores photons when exposure begins by pressing shutter release button. When the exposure is finished, the quantity of photons in each photosite gives various intensity levels of light which is determined by bit depth (0-dark and 255-white for an 8-bit image). If each photosite contains 1024 photons, then the contrast ratio would be 1024:1. Generally speaking, dynamic range of colors is higher for DSLR cameras than the compact point and shoot cameras even if their pixel is same because of the bigger sensor size in DSLR cameras (bigger sensor size means bigger photosites and hence more lights can be captured). Usually in digital cameras, the most common method of representing a dynamic range is f-stop which is power of 2. A contrast ratio or 1024:1 would there be represented as having dynamic range of 10 f-stops.
You should already be familiar with photographic concept, stop of light or f-stop. Every time the light in the scene doubles, we say that light has been increased by one stop. Similarly if the light scene is halved, we say it is decreased by one stop. In photography, f-stops are measure of the lights. If you measure the dynamic range of your eyes that is the range from darkest light to brightest light that you can perceive, you find that your eyes have around 18-24 stops worth of dynamic range. And today's most advanced DSLR camera might have 10-14 stops of dynamic range.
Basically, anytime when there is a big difference between the brightest object and the darkest object in your scene, you have probably gone beyond dynamic range of your camera. If we consider each photosite as a bucket, we can assume photons as a water drops. If the bucket is full, photons will overflow and a photosite having overflown photons means it is saturated for lights and hence defining the camera's white level and no more colors can be represented within that photosite. Below is the picture where I tried to illustrate the point where photosite is overflown by too many photons and hence loosing details of the image.
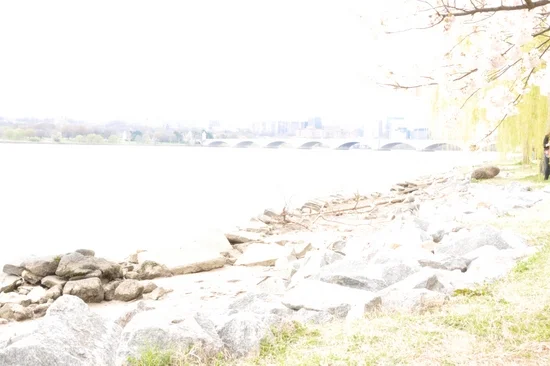
Dynamic range of colors - bright scene
Similarly, if photosite couldn't capture enough photons, it will loose the contrast in the picture and hence producing only dark side of the image.
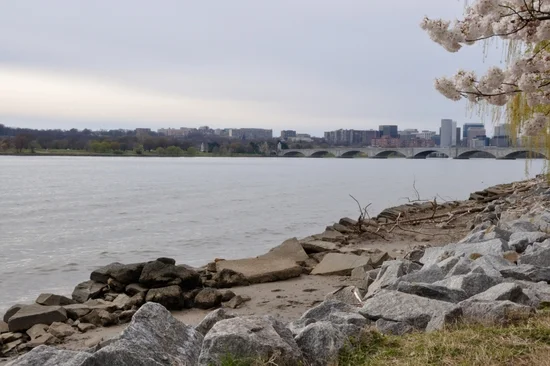
Dynamic range of colors - dark scene
With the digital cameras, it's almost impossible to get all the colors in single image specially when there is too much variation of light. That is why the concept of HDR photography is becoming popular in which we combine multiple pictures using different HDR algorithms to create a single HDR image which should give us maximum dynamic range of colors.
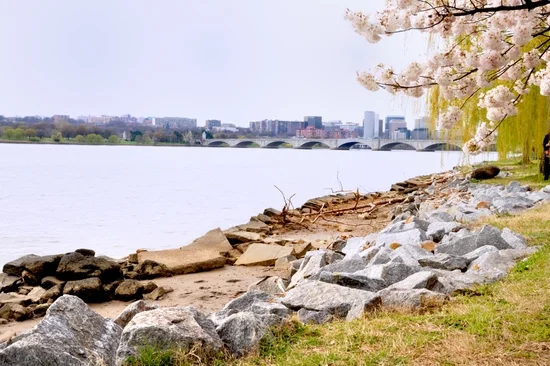
Dynamic range of colors - HDR image
In creating a image by using HDR technique, we take multiple shots from the very dark image to the very white image using the Bracketing technique where we get multiple levels of contrast and by combing them into a single picture, we get the maximum possible range of colors.


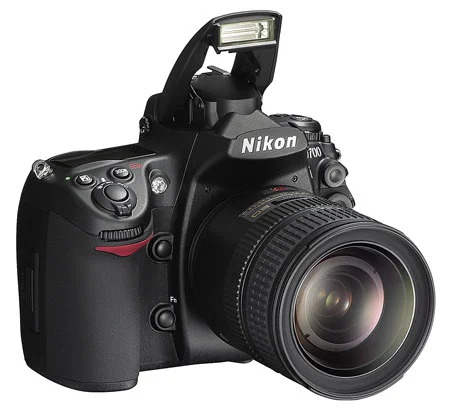



When I started my journey in digital photography ten years ago, I didn't have much interest in post processing. I was more focused on learning photography techniques, know more about the camera controls and the settings and get familiar with the gears, lights and other accessories. As I started gaining more experience with the camera setup and the gears, I felt more comfortable with the technical aspects of the shooting. Slowly, I started learning about the composition technique and used my technical skills to capture the image on various situations. The more I shoot, the more I felt that the camera was not able to capture all the colors I see through the lens. This is when I started to explore the possibility of introducing post-processing tool in my digital photography career. When I was shopping around for my first full frame but third DSLR, Nikon D700, I got introduced to Nikon’s own post-processing tool, Capture NX2, and without putting too much thought into it, I started using it. Since it was my first experience with any kind of post-processing tool, there was a steep learning curve for me but I enjoyed the process. After I started using Capture NX2 for a while, I felt like I was missing a big part of digital photography by overlooking the editing process in my early days of photography. Within a couple of months of using the software, I realized that, when post-processing is applied carefully and skillfully, it can completely change the look and feel of the picture and make it more alive again. But, suddenly, when I was just getting the hang of it, Nikon decided to discontinue the Capture NX2 software and stopped releasing the future updates and the support for the new cameras. I was still able to use the software (to process RAW files from my D700) for a couple of years even after their announcement but it became completely useless when I upgraded my D700 to D810 in 2017.
I had no choice but look for the alternatives which would support the RAW files from the Nikon D810. After doing much research, I decided to go with Adobe Lightroom. It's been little over a year since I started using the Lightroom and I couldn't be more happier. It is lightweight and very powerful program which works well with the varieties of RAW files. When I download the pictures on the computer, I import the RAW (NEF format) files directly into the Lightroom library and edit them when I want to. Besides Lightroom, I don't use any other tool to process my pictures. In terms of editing the picture, what I can do with the Lightroom, I could also do with the Capture NX2 but the process was complex and time consuming. In my experience, I found Lightroom to be much faster compared to the Capture NX2 and provides various powerful tools to edit the pictures with much more ease than it’s competitors. All of the edits done inside the Lightroom are non-destructible, which means Lightroom doesn't modify the original RAW file but only adds the instructions on the file based on what settings were applied during the development of the picture and renders the image by layering up those instructions step by step. You can always go back to the previous steps and undo the changes you made in those steps. However, Lightroom being a linear program, what you can not do is; you can not undo or erase one particular step in the middle and keep rest of the edits intact. For example, after applying 10 steps of editing (changing any one setting is one step of editing), you can’t undo only the 7th step and preserve the changes made in 8th, 9th and 10th steps. If you do so, it will delete everything from the 7th step up-to the 10th step and you have to progress the future editing from the 7th step again.