Digital Photography

My Experience With The Nikon D810

I have had Nikon D700 for more than five years and loved every bit of it. When it was time for an upgrade, I was looking for a camera with a similar kind of body and controls. After doing much research, I ended up buying Nikon D810 even though Nikon had just announced D850 to upgrade D810. Before getting D810, I was struggling between D750 and D810 but my decision was made easy once I got my hands on both cameras. Even though D750 is newer model than D810, same look and feel and control as my trusted D700 sold me to D810. Some argue that D750 has better dynamic range than D180 but when I was happy shooting with even D700, I was pretty sure that D810 wouldn't disappoint me and it didn't. After I got my camera, I took it to the New York trip this December and got few shots of New York City and some of the city skyline. After I downloaded the pictures on my computer, I was amazed by the dynamic range of this camera and the details it captured. One of my favorite shot from this trip was mid-town New York City view from my hotel room. After having dinner, when I came back to the room, it was already dark and the town was glowing with the city lights. The city view from my room looked amazing and I was excited to capture it. When I took the test shot, I saw some reflections during the playback on the camera LCD screen. I had no choice but to wait little more so that the lights from neighboring rooms and other hotels will start fading and then try another shot. After waiting for few hours, I closed all the lights in my room and increase the camera distance to the glass window so that the camera reflection on the window wouldn't show up on the picture.

Whatever I did at that time to cut down the lights and avoid reflection, it worked and the picture came out with every possible detail I was expecting from 36 Mega-Pixel full frame camera. When I zoomed the picture to 100%, I could even see a person inside distant hotel room. The clarity of the camera sensor is amazing, I love the dynamic range and every detail was visible in the picture. I used Nikon 16-35mm f/4 wide angle lens with the D810 and processed the image using Adobe Lightroom.

Midtown New York City View (click the image to view full size)

Please let me know what do you think of this picture and if you are also shooting with D810, please share your experience with this camera. I always appreciate your feedback or any comments you may have. Happy Shooting!

Using a 10-Stop ND Filter For a Long Exposure Shot

Last Saturday, I did a little fun experiment with the speed of the shutter on the flowing water while keeping the other exposure parameters, Aperture and ISO value, same. I had seen some really nice photographs on the Internet with the milky effect on the water which inspired me to try something similar on my own. I really wanted to try this on a big water fall where the water volume and the current is high but one of the such area I know nearby was closed due to the bridge construction. I am planning to go there again after the construction is finished. Meanwhile, I tried something similar in a little creek near my area. It was a bright sunny day and the only way I could achieve a long exposure shot was by using a Neutral Density filter. Here is the list of the tools I used for this setup. 1. Nikon D700 DSLR Camera 2. Nikon 16-35mm f/4 Wide Angle Lens 3. 10-Stop ND Filter (To stop the lights so that I can use the longer shutter speed to get the milky effect) 4. Shutter Release Cable (It is recommended for a long exposure shot to avoid any camera shake. If you do not have one, you can use the 2 seconds timer on your camera) 5. Tripod (It is a must have tool for a long exposure shot) 6. Exposure Calculator App (To calculate the exposure after applying a ND filter)

After setting up the camera on the tripod, I measured the correct exposure (in a Manual Mode) before using a filter and took a shot. I used the widest possible focal length (which is 16mm on this lens) and chose the minimum ISO possible to avoid any digital noise. And since it was a sunny bright day, I didn't need a higher ISO anyway. I turned off the VR on the lens (really don't need when you are shooting on a tripod), selected an aperture value of f/11 and manually focused the lens to the infinity to get everything in focus through out the frame. With an aperture value of f/11 and ISO 100, camera meter gave me the correct exposure with the shutter speed of 1/8th of a second. Here is the first shot with those camera settings.

Water_Effect_Short_final.jpg

 Focal Length : 16 mm     ISO : 100     Shutter speed : 1/8 sec     Aperture : f/11

Exposure-Calculator-App.jpg

Then, I applied a 10-stop ND filter on the lens and calculated the required shutter speed (using an app on the left side) to compensate the lights blocked by the filter. Since I left the ISO and the aperture values same, Exposure Calculator App gave me the shutter speed of 128 seconds as the right shutter speed to get the correct exposure. Most of the modern DSLR supports the shutter speed of up-to 30 seconds and if you need more than that, you have to dial into the BULB mode and open or close the shutter manually by pressing the shutter release button. But the cool thing about this app is that it gives you a stopwatch (at the right bottom corner) after you calculate the new shutter speed. When you are ready to take a shot, you can snap the shutter release button (with the shutter release cable) and then start the timer on the app at the same time. And when your timer goes to the Zero, you can release the shutter as well by releasing the button on the shutter release cable. When I took the second shot, I noticed that the shot was little bit underexposed. Then I took another shot without changing any settings but kept the shutter open for an additional 5 seconds than the app suggested. If you are shooting in a RAW, little bit underexposed image is far better than the overexposed because it is easier to bring the details from the shadow than from the blown out highlights during the post processing. The reason I got the underexposed image with the calculated time could be due to the changing light during the long exposure time or the filter coating variation or the programming on the app itself. Normally, I take the value given by an app as a base value and then play around few seconds left and right while monitoring the histogram chart on the LCD monitor until I get the correct exposure. Here is the second shot with the long exposure setting (notice the leaves movement and the person in a picture below which are the distractions).

Water_Effect_Long_final.jpg

Focal Length : 16 mm     ISO : 100     Shutter speed : 133 sec     Aperture : f/11

May be due to the amount of the water flowing in the creek and the current of the water, long exposure didn't produce very much dramatic effect that I was hoping for but there is some noticeable effect on the water due to the longer shutter speed. Some people prefer the first version with a shorter shutter speed and some prefer the second version. I am not sure which side of the aisle you are on but it doesn't hurt to try something new and out of the ordinary as long as you enjoy doing it.

How To Photograph Fireworks

It is that time of the year again when we all get excited to capture the 4th of July fireworks. Capturing a stunning fireworks is an art work and an experimental fun at the same time. I think it is a new experience every time no matter how many times you have done it before. Sometimes, we get the perfect location and our camera settings work perfect but sometimes things won't turn out the way we want them to. But, no matter what, at least for me, when I go to shoot fireworks, it is always an exciting moment whatever the outcome would be. The moment of a celebration, meeting varieties of people and sharing our experiences with each other is another attraction of this event. Also, fireworks is probably one of the best form of an outdoor entertainment as well.

Before Fireworks

Before Fireworks

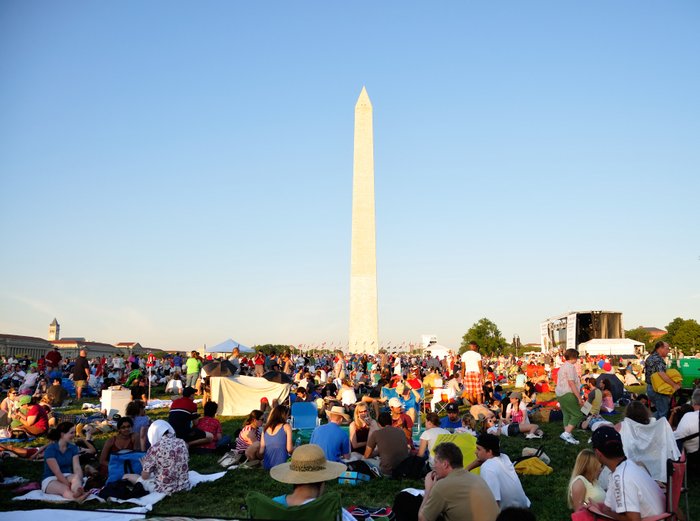
It is very important to reach the fireworks area at least 30 minutes to an hour prior so that you can choose the best location possible to view the fireworks and setup your camera on the tripod. You don't want to sit too close to the fireworks because of the smoke coming out of the fireworks. It does not look pretty getting those cloudy smoke in the frame (sometimes you can't avoid them during a shooting but you can edit them out during post processing). Also, if you are too close to the fireworks, it will get difficult to balance the exposure and you might need a wide angle lens to cover the shots as well. And, you don't want to go too far either, otherwise you will end up missing lots of details. You want to get a clear fireworks shot with the clear dark background.

I am trying to cover everything about shooting fireworks that I have learned over the years and divided this blog into two sections; basic hardware you need along with your camera and the camera settings for the fireworks.

Taking-fireworks-picture.jpg

First, let's discuss about some of the hardware you need to shoot fireworks.

1. Camera and Lens Camera : For the best results, you might want to use a camera that has a Manual mode. The reason is, you can't control what parameters camera will select in an Automatic mode. In a Manual mode, you can adjust an Aperture, Shutter speed, ISO and many other factors to control your exposure in a given shooting environment.

Lens : I suggest mid-range zoom telephoto lens for the fireworks since you can zoom in and zoom out depending on your location and distance to the fireworks. My personal favorite is 18-200 mm f/3.5-5.6G VR II (if you are using a DX format DSLR) and 70-200 mm f/2.8G VR II (if you are using an FX format DSLR).

2. Tripod If you are planning to shoot fireworks without a tripod, you are probably wasting your time. If you want to get a crisp image, you can't shoot fireworks without using a tripod. Since we are shooting with a low ISO to avoid any possible noise and using 2 to 5 seconds of exposure time (shutter speed), we will get a blurry image shooting handheld. That's why it is probably the best idea to get a sturdy tripod that supports the weight of your camera body along with the lens. I use Manfrotto 055XPROB Pro tripod with a Manfrotto 498RC2 ball head.

3. Remote shutter release While shooting fireworks, you want to prevent your camera from any kind of shaking or vibration. Using a camera on a tripod definitely makes it stable for a long exposure shot and using a remote shutter release helps to avoid any camera shake while pressing the shutter release button. I use remote shutter release cable for this purpose. You may be able to use wireless shutter release if your camera supports it but I am not sure how easy will it be to use it at night and specially when you are in the crowd.

July 4th Fireworks

July 4th Fireworks

Now, after getting all the hardware together, let's discuss about the Camera Settings to get the best result possible. These are guidelines and not the hard and fast rules.

1. Turn your camera Mode dial into a Manual Mode (M). As you already know, Manual mode allows us to pick our own settings for ISO, Shutter speed and Aperture and adjust them individually to set the correct exposure.

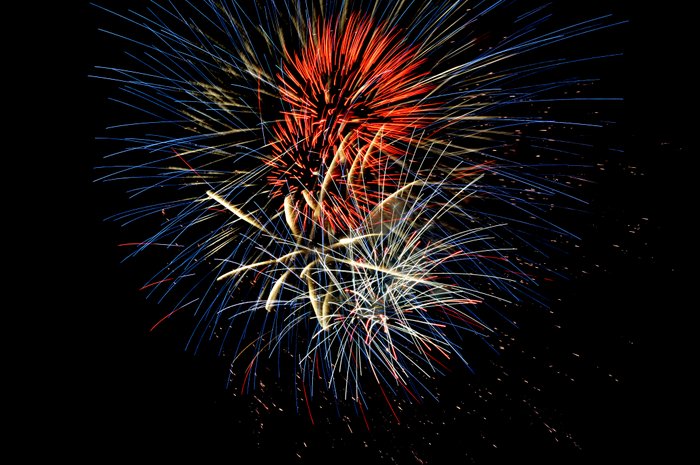
2. To start with, set the Shutter speed between 2 to 5 seconds and an aperture between f11 to f14 to achieve deep depth of field. Combination of a slower shutter speed and a smaller aperture (larger f value) let the camera sensor to collect more lights, maintain a sharp focus throughout the frame and produce the trail of lights forming a beautiful fireworks.

3. I recommend using a Manual focus when you are shooting long distance subject (that is moving fast as well) in a low light condition. The reason is, camera's Autofocus system may not be able to track the subject accurately (every time) and lock the exposure to activate the shutter release button. For few initial shots, you can activate the camera's Autofocus system by pressing the shutter release button halfway down (lens should be in Autofocus mode) and once you get the clear focus, switch the focusing mode into a manual mode so that your camera doesn't need to track the fireworks and re-focus it every time it is fired which might slow down the capturing process. If you change the focal length (zoom in or zoom out) of your lens, you have to repeat this procedure again to get the fireworks in focus.

How-to-photograph-fireworks.jpg

4. If you do not have a remote shutter release option available at the moment, you can apply this little trick to avoid any camera shake: set the shutter release option into self timer mode and set the timer into 2 seconds. That will trigger the shutter release button only after 2 seconds of pressing it and avoid any potential camera shake. But you have to be careful with the timing of pressing the shutter release button and firing of the fireworks. Otherwise you could miss the good shots.

5. Turn the Auto ISO off and shoot with minimum ISO possible, ISO 100 for example, to reduce any digital noise. When you shoot with an Auto ISO mode on, camera may bump up ISO value to compensate the low light condition and produce grainy noise in your picture.

6. You can turn off Image Stabilization (IS) or Vibration Reduction (VR) feature on your lens while shooting on a tripod. Turning it off also reduces the amount of moving parts inside the lens and makes capturing process much faster.

How-To-Shoot-Fireworks.jpg

7. While shooting fireworks, I recommend shooting in a RAW mode rather than a JPEG mode. That way you can always touch up later to remove any smoke or other distractions from your photographs.

8. Set the White balance into Auto mode. It works well most of the times and even if it doesn't, you can always change it during the post processing if you shoot in a RAW mode (another reason to shoot RAW).

9. And, you want to switch off your camera flash if you haven't already.

Take a few shots with the suggested camera settings and see how it works for you. If the image is too bright or too dark, adjust your shutter speed or aperture settings. It gets tricky during the end of the show when they tend to finish up with the rapid fire and you may end up getting over exposed photograph if you do not adjust your exposure settings accordingly. Personally, I would like to set an Aperture value into a large number (small aperture) and keep it fixed and only adjust the Shutter speed to a different value to control the ambient light. That way, you get the deep depth of field keeping everything in focus and also it will be much easier and faster just to adjust the shutter speed using the command dial depending on whether you are over exposed or under exposed. But you also have to be careful not to open the shutter for too long which might capture a longer action making your fireworks look blurry. You can also try the BULB mode (if available in your camera) and time the closing of the shutter as soon as the explosion ends so that you won't get any smoke into your frame. When using the BULB mode, you can use your cellphone timer to time the exposure.

How-to-take-Fireworks-shot.jpg

Focal Length - 27mm     Aperture - f/20     Exposure - 4 sec     ISO - 200

After taking few shots with the recommended settings, you can always experiment with it and be creative with your shots. More you shoot, more creative you will become and minimize the chance of getting errors and making mistakes. Learning from our mistakes and not to repeat it again is the key for success. Do not hesitate to grab your camera and do some experiments with it on this upcoming July 4th fireworks.

Happy 4th of July everyone and Happy Shooting!