Q & A

What Does Dragging The Shutter Mean And When Should We Use It?

This post is a part of our Q&A section. If you want to submit your question, please use the form in the Contact page.

QA.jpg

Ed (Colorado, USA) asked : I have heard the term "dragging the shutter" quite a few times from professional photographer. Do you mind explaining it with an example may be?

When you are shooting at night, you have to deal with different types of lights; flash light (if you are shooting a portrait), street lights and environmental lights. Sometimes you want to shoot without the background objects but there are times when you want to capture the beautiful background scene or nicely lit architecture along with your subject (portrait for example). If you have noticed latest point and shoot cameras or even some entry level DSLR cameras, there is a mode called "Night Portrait" mode which is basically an auto mode. If you turn your mode dial into Night Portrait mode, camera automatically manages the camera settings to capture the portrait along with the background lights. While using one of these auto modes, sometimes you get the good result but sometimes you may need more control over the exposure parameters or the flash mode to get more balanced result. If you want to control the lights and camera settings, you have to step up and dial into one of the semi-manual (S, A and P) or full manual (M) mode and set the parameters accordingly.

You might have used this technique before knowingly or unknowingly and you are just not familiar with the terminology which happens to all of us at some point. It is all about balancing flash and ambient light (light that exist in the environment). When balancing ambient light with flash light, photographers choose camera settings to retain the mood of place, time and environment of shooting. While doing so, we have to allow ambient light by allowing shutter to open little longer (dragging the shutter) and apply the flash light at the end of the exposure (usually to freeze the motion).

Dragging the shutter is very simple and also commonly used technique while doing night portrait photography. It is important to know whether you are using a Manual flash or a TTL flash setting with your camera. If you are using a Manual flash, usually Aperture, ISO, subject distance with the flash and the power of the flash affect flash exposure. Whereas ISO, Aperture and Shutter speed usually contribute to the ambient light exposure. That means you can use the Shutter speed independently to control ambient light exposure only because changing Aperture and ISO will also affect Manual flash exposure. The environmental light (also called ambient light) is continuous source of light but flash light is gone with the blink of an eye which is the main reason why we say Shutter speed doesn't contribute to the flash exposure.

But if you are using TTL flash, those four controls (Aperture, ISO, Distance and the Power) have no control over the flash exposure because your camera and the flash talk to each other based on the Aperture, ISO, distance to the subject and apply appropriate flash power to give the correct exposure. That means you can now use Aperture or ISO or Shutter speed to control ambient light without affecting flash exposure. Using TTL flash is relatively easy and you don't have to remember much while changing camera settings but if you are using Manual flash, you have to be very careful about what setting you have changed because if you change your Aperture, you have to change flash power or ISO or distance to compensate flash exposure but at the same time changing Aperture also affects ambient and hence you may have to adjust Shutter speed too. It's kind of confusing but enough practice clears confusion.

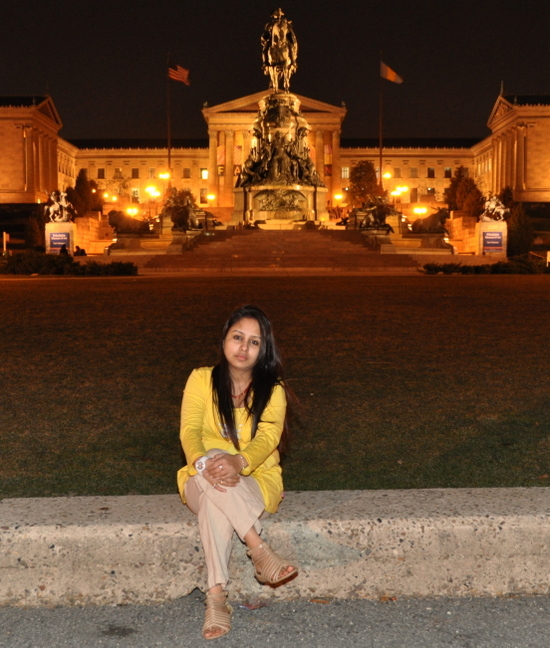
Night portrait

Night portrait

Shutter Speed : 1/60     Aperture : f/4     ISO : 220

Usually dragging the shutter slower than 1/60th of second allows you to register ambient light but you can change shutter speed as you need more and more ambient light. I usually use rear sync flash with slower shutter speed so that your final moment would be frozen.

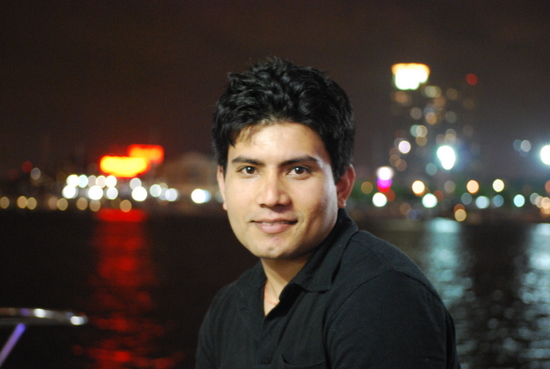
Dragging the Shutter

Dragging the Shutter

Shutter Speed : 1/5     Aperture : f/4.2     ISO : 1600

Dragging the Shutter

Dragging the Shutter

Shutter Speed : 1/3     Aperture : f/4     ISO : 800

Baltimore-Inner-Harbor-Night-portrait.jpg

Shutter Speed : 1/5     Aperture : f/4     ISO : 1600

These images are taken with TTL flash and you can see how changing camera settings is adopted automatically by flash unit and applying appropriate power to properly expose the image.

What Is Hyperfocal Distance And When To Use It?

This post is a part of our Q&A section. If you want to submit your question, please use the form in the Contact page.

QA.jpg

Rona (CA, USA) asked : I am very much interested in Landscape photography. Sometimes, when I shoot Landscape, it doesn't come out as sharp as I expect it to be. I have heard about Hyperfocal Distance and it's use in landscape photography but haven't used it yet. Can you please explain about it?

Hyperfocal Distance is the magical distance to focus on that gives you maximum depth of field (almost everything in the frame will be in sharp focus). Hyperfocal Distance differs with the focal length and the aperture of the lens. When you focus your lens on Hyperfocal Distance, the depth of field extends from half the Hyperfocal Distance to infinity. As you already know, for the maximum depth of field, you should always shoot with smaller aperture (large aperture value) like f/16 or f/22 for example. Most of the serious amateur and pro landscape photographers use Hyperfocal Distance for Landscape photography.

This short and brief introduction about Hyperfocal Distance may create more confusions and lead you to many more questions. You might be thinking what is the Hyperfocal Distance for the lens I have? How do I focus at Hyperfocal Distance? Which lens is the best for Landscape photography etc. In this article, I will try to answer these questions as clearly as possible.

How to Calculate Hyperfocal Distance?

Hyperfocal Distance can be calculated by using following equation.

Hyperfocal Distance Equation

Hyperfocal Distance Equation

Where, H is Hyperfocal Distance, f is Focal Length, N is f-number (Aperture value) and c is the Circle of Confusion

[Updated on 12/1/2015 after reading nev’s, one of our reader, comment. I did some research on the link he posted on the comment box below and also took some reference from Wikipedia as well and added the second formula]

But, for any practical f-number, the added focal length is insignificant in comparison with the first term. So, following formula can also be used to calculate H.

Hyperfocal Distance Formula

Hyperfocal Distance Formula

This formula is best suited if H is measured from a thin lens. But, for practical purposes, there is little difference between the first and second formula.

When you calculate Hyperfocal Distance (H) using any of the above equations, it comes in mm (millimeter) unit and you have to divide the result by 304.8 to get into the feet and by 1000 to get into the meter.

Hyperfocal Distance is a function of lens focal length, aperture value (f-number) and Circle of Confusion (CoC). In photography, the Circle of Confusion (CoC) is used to determine the depth of field, the part of an image that is acceptably sharp. A standard value of CoC is often associated with sensor type or size and brand of the camera. Every camera manufacturer has it's own CoC value for their different body types and sensors. Normally CoC for 35 mm or equivalent camera (FX format) is 0.030 mm and that of APS-C sensor (Nikon's DX format) is around 0.019 mm.

How do I focus at Hyperfocal Distance?

When you are in the field shooting landscape, you don't have to focus the lens exactly at the Hyperfocal Distance. It's best if you can focus on exact Hyperfocal Distance (you might want to use the measuring tape in that case) but even if you can't, there are different ways for work around. When you are not sure about focusing exactly at Hyperfocal Distance, experts recommend that you should focus it slightly beyond the Hyperfocal Distance. Let's say, for example, your Hyperfocal Distance is 4.6 feet, you should focus on 5 feet and then stop down aperture by one stop (from f/16 to f/22 for instance) to get a little more depth of field.

Why telephoto lens is not good choice for Landscape Photography?

Wide angle lenses are very much popular for Landscape photography. However, normal lens ranging from 50mm or shorter can also be used and works very well to adjust Hyperfocal Distance. Lenses having shorter focal length have relatively short Hyperfocal Distance when set to small aperture (larger aperture value). For example, the Hyperfocal Distance (using above formula) for a 14 mm lens set to f/16 aperture on a 35 mm or equivalent camera is about 1.43 feet. That means everything from 0.71 feet to infinity will be in focus taken with the lens focused at Hyperfocal Distance.

If you do same mathematical calculation for telephoto lenses, you will find the reason why telephoto lenses are not being used for Landscape photography. For example, the Hyperfocal Distance for 200 mm lens set to f/16 on a 35 mm camera is about 275 feet. That means everything from 137.5 feet to infinity will be sharp in a photograph taken with this lens focused at Hyperfocal Distance. Let's say if you have any subject near than 137.5 feet (half the Hyperfocal Distance), this lens will not be able to focus them. That's why such lenses with longer focal length are not considered useful for Landscape photography.

I hope I was able to answer your question to some extent. If you have further comments or questions, please do not hesitate to use the comment box below. Happy Shooting!

What Is Depth Of Field (DoF)?

This post is a part of our Q&A section. If you want to submit your question, please use the form in the Contact page.

QA.jpg

Manjit Singh (Delhi, India) asked : Can you please explain me about Depth of Field and it’s relation to the camera settings?

This is what Wikipedia says about DoF - In photography, depth of field (DoF) is the distance between the nearest and the farthest objects in a scene that appear acceptably sharp in an image. Although a lens can precisely focus at only one distance at a time, the decrease in sharpness is gradual on each side of the focused distance, so that within the DoF, the unsharpness is imperceptible under normal viewing conditions.

Sometimes you want to focus everything inside the frame (for example you are doing landscape photography), and a large DoF is appropriate. And in other cases where you are doing macro photography or portrait photography and want to blur the background, a small DoF may be more effective, emphasizing the subject while de-emphasizing the foreground and the background. Usually, a large DoF is often called deep focus or deep depth of field, and a small DoF is often called shallow focus or shallow depth of field. Now let’s discuss briefly about these terms.

Shallow depth of field: When you selectively focus one part of the image and let rest of the image go out of focus, you will get shallow depth of field. This is pretty famous when you are shooting macro or portrait and want to blur the background or produce nice bokeh in the background.

Shallow depth of field

Shallow depth of field

Focal length : 28mm     Aperture : F/4.5     Shutter speed : 1/40 sec     ISO : 200

Deep depth of field: When you want to keep everything inside the frame from the foreground to background in focus using correct combination of camera settings, it is called deep depth of field or larger depth of field.

Deep depth of field

Deep depth of field

Focal length : 32mm     Aperture : F/8     Shutter speed : 8 sec     ISO : 200

Now let’s take a look at the camera settings that affect depth of field. The DoF is determined by an Aperture, lens Focal length and the physical distance from the subject.

1. DOF and its relation to an Aperture

To get shallow depth of field, you need large opening of the Aperture. And please keep in mind that large opening of Aperture means small f-stop value. Smaller the f-stop value, larger the lens aperture opening will be (allows more light and faster shutter speed) and larger the f-stop value, smaller the lens aperture will be (allows less light and slower shutter speed).

In another word, we can say: for a given subject magnification, increasing the f-number (decreasing the aperture diameter) increases the DoF; decreasing the f-number decreases DoF.

If we keep the focal length and the distance from the subject fixed: larger the opening of Aperture (small f-stop value), shallower the depth of field you will get and smaller the opening of Aperture (large f-stop value), deeper the depth of field you will get.

2. DoF and its relation to the Focal length

Focal length is something that depends on type of the lens you are using. If you are using zoom lens, you can zoom in and zoom out to increase and decrease lens focal length.

If we keep an Aperture and the Distance from the subject fixed: larger focal length will give you shallower depth of field and smaller focal length will give you deeper depth of field.

3. DoF and its relation to the Distance

Physical distance from the subject to the camera also affects depth of field.

If we keep an Aperture and the focal length fixed: closer you are to the subject, shallower your depth of field will be and farther you are from subject, deeper your depth of field will be.

Conclusion: Larger aperture opening (small f-stop value), closer to the subject and larger focal length will give you the shallowest depth of field possible.