
The title of the blog suggests that it would a math or physics article but please read until the end and I promise that it would be a interesting read once you find its connection with photography. Today’s topic is practically very important if you are dealing with flash light or studio strobe in your day to day photography. So, without wasting any time, let’s get right into it and see how can we apply the law into our photography world.
In physics, an Inverse Square Law is defined as "any physical law stating that a specified physical quantity or strength is inversely proportional to the square of the distance from the source of that physical quantity". And mathematically, we can write this law as,
Intensity=1/d2, where d is the distance between the light source and the object.
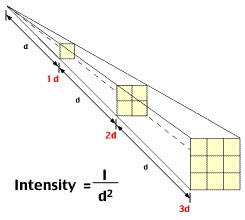
Inverse Square Law
If you have read the definition carefully, it mentioned “any physical quantity or strength”. That means anything on this earth can be related with this law (for e.g. force, energy, light etc). But today we are going to relate the law with photography, and that means we will talk about the light source and its relation with the distance to the subject. We just looked at the mathematical definition of inverse square law, which shouldn’t scare you even if you are not a mathematical genius. Let me try to decode the formula and explain it in a simple language. Basically, the formula says: the intensity of the light is inversely proportional the distance to the light source, which means the light gets brighter when we are close to the light source and light gets darker and darker as we increase the distance from the light source. I am pretty sure that you would agree with me on this statement and can be related to your daily experience as well, right?
We just discussed the essence of the formula but let’s try to define it again with more precision. And, that is: an object that is two times far from the light source will receive a quarter of the illumination. In photography world, this means, if you move your subject from 1 feet to 2 feet away (double the distance) from the light source, you would need four times as much light to get the same exposure. It’s because according to the Inverse Square Law, light intensity at the 2 feet distance will be 1/4. This extra light can be achieved by changing either Aperture, or Shutter speed, or ISO value by two full stops and compensate the exposure. If you change the aperture, you would need to wide open the lens by two full stops and if you plan to change the Shutter speed, you would need to decrease the shutter speed by two full stops to allow enough ambient light to get the proper exposure. Similarly, you can also change the ISO value by two full stops to get the same exposure.
This light fall-off behavior is pretty interesting if you do more research. As you move the subject far and far from the light source, light fall-off is not that much significant as it is in the beginning. Let’s say you get 100% light in 1 feet distance from the light source, we can form the following table to analyze the behavior of the light with the distance.
Distance Intensity of Light
1 1 (100%)
2 1/4 (25%)
3 1/9 (11%)
4 1/16 (6%)
5 1/25 (4%)
6 1/36 (3%)
7 1/49 (2%)
8 1/64 (2%)
9 1/81 (1%)
10 1/100 (1%)
So when you move the subject from 1 feet to 2 feet from the light source, light intensity will be decreased by 75% but when you move further from 2 feet to 3 feet and 3 feet to 4 feet and so on, light fall off is very minimal and at the end there is no difference at all. It clearly demonstrates the importance of a distance and shows how it affects the behavior of the light. You might find this helpful in the future whenever you are dealing with lights, especially flash lights or studio strobes to illuminate your subject.

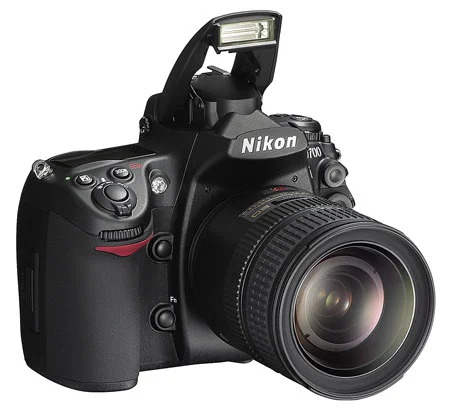




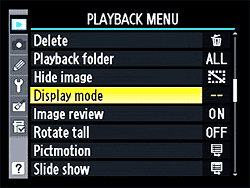

Almost all consumer level DSLRs and some of the pro level DSLRs come with the built-in flash. Professional photographers who shoot wedding, fashion, commercial portrait, or other special events do not rely on built-in flash to illuminate their subject. But, you don't have to use flash only when there is not sufficient natural light. It can also be used as a fill light to remove shadows or to add a catch light to the subject's eye. One of the best thing about the built-in flash is, you don't have to carry around an extra equipment and is always available on your camera, as long as the camera has sufficient battery power to charge and fire the flash. It can be put to use instantly whenever you want and doesn’t require any sophisticated setup. However, you need to understand few basics settings of your camera and should be comfortable navigating through the menu settings and the buttons on the camera.
Use of camera's built-in flash and its effect on the picture is determined by various settings on the camera, but most importantly, which metering mode you are currently using and what exposure mode you are on play a bigger role. Let's recap these camera metering modes briefly and then we can discuss about the steps we would be following in order to use on-camera flash. Since I wrote the blog about camera metering (in more detail) almost 9 years ago, Nikon has added a new metering mode; Highlight-Weighted Metering, which we will be discussing in the section below.